Showing posts with label organization. Show all posts

Bundle of Love & New Copic Storage!

Sunday, March 15, 2015

If you're looking for my Paper Sweeties March Release Party post, click here.

Three years ago, my sister-in-law asked me to make her an African-themed wedding card. Well, that couple is now having a baby boy, so I was asked to make an African-themed baby card for the baby shower, using yellows and browns.
Using one of this month's Viva la Verve sketches, I chose to use jungle and giraffe print paper, and some burlap for texture. The giraffe image was colored with Copics. I like to try to add some kind of sparkle or shine to most of my cards, so I opted for metallic sequins around the edge of the picot edge die cut, and added Glossy Accents to the ball of the rattle. I hope she likes it.

Now, I just had to share this, too...
NEW STORAGE FOR MY COPICS!!!

My brother (the same one who is married to the SIL who needed the above card) and I live fairly close to each other and get together every few weeks. The last time he was at my house, he started talking about some new woodworking tools he had gotten. I didn't even know he did woodworking! Well, in jest (ok, partly in jest) I mentioned that it sure would be nice if he could make me some storage for my Copics. I've tried different things in the past, and there has always been something wrong with them. Mostly the little cubes weren't deep enough and if I pulled a marker off the bottom of a stack, all the other markers would come tumbling out. Well, my thoughtful brother got right up and measured one of my Copics, got a few details of what I needed, and in just a few days I had this new storage! The wood is bare so I can paint, stain, or cover it any way I want, but, honestly, he did such a great job sanding it, I can't bare to cover it up!


Here it is all loaded with Copics. His measurements were perfect!!! OMGosh, this just made me SO happy! Thank you, Paul! You're the BEST!

Thanks for stopping by, and have a wonderful weekend! And, don't forget that Paper Sweeties' newest releases are available now! And, I'll be back tomorrow with my March Release Rewind post, where we create by mixing the new releases with older releases. 

I'm entering this card in the following challenges:
Viva la Verve March 2015 Week 2 Challenge
Simon Says Stamp Monday Challenge: B is for... (Baby)
Chocolate, Coffee, and Cards Challenge #86-For a Child
Corrosive Challenge #220: Our Animal Friends

~Hugs,

Supplies Used:

Thanks for visiting my blog!
To have Ink Up delivered to your inbox,
subscribe in the box at the top right of the page.

One Pantry, Organized

Monday, April 8, 2013

I normally post cards on my blog, but I enjoy seeing how other people organize their homes and thought you might, too, so after I spent a few days last week organizing my kitchen pantry, I thought I'd share it with you. :)

(If you just want to see the before and after photos, I have them together at the bottom of the post.)


I tend to be fairly organized overall, but my method is usually organized chaos. This is my pantry just before I emptied it completely out. I had designated each shelf for specific types of items. Not too bad, but you can probably tell I didn't stick too well to my original plan.


My kitchen is a medium shade of avocado green, and the inside of my pantry, including the ceiling, was, too, which made it pretty dark inside, even with the light on. So, I painted the whole thing white (with some help from my DH, who tackled the high corners for me). I've been seeing a lot of decorative stenciling inside pantries, so I decided to give that a try, too. I figured, even if I messed it up really bad, I could just paint over it again, and most of it wouldn't show anyway once I put everything back inside. I had a hard time finding stencils I could live with. These are pretty, but not exactly "me." But, I was on a roll, you know, and I wanted to get it finished, so I went with it. ;) The dragonfly image at the top of the post is a close up of one of the stenciled images. I originally wanted them to be yellow, but that barely showed up, so I improvised. I grabbed a dauber of teal acrylic paint from the craft room and re-stenciled the entire thing, leaving a good bit of the yellow showing through for a distressed look. You know I love distressing!


We have very high ceilings throughout our home, and the ceiling of this pantry is 10' up. It ends up being quite a lot of wasted space, but people often look up at our ceilings because of the height, so I stenciled a couple of dragonflies on the pantry ceiling for a bit of interest. You can see here, that I also stenciled the sides of the pantry, too, although not as much as the back.


You may have noticed in the before picture that the top shelf was warped. I'd never noticed it before, but once I did, it really bugged me, so I replaced it with a new, straight one. Also, I despise wire shelves, so I covered foam core board with contact paper and lined the shelves with them. Now, when I look in my pantry, each shelf stands on its own, rather than having to see everything above and below them, too.


And, here's the finished pantry! I decided to add an additional higher shelf, even though it covered up a lot more of the stenciling because I almost always opt for function over fashion. We'll have to use a tall step ladder to get to it, but since I'm using it to store unopened items that are waiting their turn to be used, it's not that inconvenient. I have a much larger pantry in the basement (that also needs a major overhaul) where I can keep these kind of things, but you know that saying, "out of sight, out of mind"? Well, I end up throwing a lot of stuff out just because I forget it's down there.

In case you're wondering how I got my pantry this neat and have so much extra space, I'll tell you my secret.... I threw out all the expired food. It shocked me to see how much there was. I ended up hauling out two trash bags of old food that had accumulated in the back of the pantry where I couldn't see it anymore. I even had an old jar of Tang that expired eleven years ago!!! OMGosh, we've only lived in this house for four years, so I brought it here in the move, and we don't even drink Tang! I think I used it in a craft project at some point. Do you have anything like that in your pantry? I'm going to keep a much closer eye on mine from now on. Of course, I also combined multiple packages of food that were opened (but not expired!), and bought several air tight containers to corral like items and to store dry goods in that took up a lot of space in their original packaging. I threw out those boxes that were on the floor for chip bags, and will put those in the green basket now. I'm hoping the floor will stay nice and empty from now on. It looks so much nicer, don't you think? :) The only problem I have with my pantry now is that I find myself opening the door a lot more--just to look at it. Now, instead of wasting space, I'm wasting time! I'll be glad when the new wears off. ;)


 BEFORE:                                                                            AFTER:
pic name                     pic name

I love my new pantry! We had a huge mess in the kitchen for three days until I could get it finished, and I was exhausted from painting inside such a cramped space--especially up in the ceiling, but I have to say it was totally worth the effort.

What's the oldest expiration date in your pantry? Can you top my eleven-year-old Tang? :D

Simon Says Stamp and Show has a "Fly" challenge this week. Since I've got birds and dragonflies stenciled on my walls, I think this qualifies!!!

I'll be posting a card next time. Thanks for stopping by, and have a great week!

~Hugs,

 
Thanks for visiting my blog!
To have Ink Up delivered to your inbox,
subscribe in the box at the top right of the page.

Chair Backpack

Thursday, August 16, 2012

Hi Friends! Hope you're having a good week, so far. I have a little sewing project to share with you today. My DD has to have her running shoes for P.E. 2-3 days a week, so rather than having to remember if it's an "A" week, with P.E. on Monday and Friday, or a "B" week, with P.E. on Monday, Tuesday, and Friday, I decided to let her leave a pair of shoes at school all the time. Only problem was that there was no where for her to keep them--space is limited in her classroom. So, I made her a backpack for her chair that she could keep her shoes and socks in all the time.

I found this tutorial by Amy at www.ourscoop.blogspot.com, and followed it almost exactly, with only a few adjustments. My DD's shoes and a couple pair of socks fit in it perfectly, and because it hugs the back of the chair so well, her regular backpack will still hang on top of this just fine.

I made this out of fabric that was leftover from some Roman shades we had made in our previous house. It's upholstery fabric, so it is very sturdy and stiff--perfect for a backpack. I used interfacing on the exterior fabric, but not on the lining.

The bag is hanging on one of my kitchen chairs here, so you can see what it looks like from the back.

I put Velcro strips on the flap to hold it closed, but if I made it again, I'd probably just make the flap much longer and add weights to it so the Velcro wouldn't be necessary. There is plenty of room inside. Even as my DD grows and her shoes get larger, they should still fit in there for quite a while.

The main three modifications I made to the tutorial were that I sewed the sides and bottom strips together before attaching them to the front and back of the bag--both on the exterior fabric and the lining; I did not cut the bag flap before attaching the ruffles; and I also sewed the edge of the ruffles into the bag flap seam. When I attached the ruffles, I first attached the top ruffle, right sides together, so that it would fold down and cover the unfinished edge of the fabric. Then, I attached the bottom ruffle underneath the top ruffle, with right sides up on the ruffle and the bag flap. After that ruffle was attached, I pressed the top ruffle down over the bottom ruffle and topstitched across the edge of the top ruffle to hold it in place. You just have to make sure you have the ruffles positioned exactly where you want them so they will cover the edge of the bag flap. 

I did consider how bad the bag might smell after a few months of having sweaty shoes in it, so I made a couple of simple sachets out of medium weight cotton fabric and filled them with Arm & Hammer Extra Strength Carpet Odor Eliminator. She will just drop one into each shoe when she puts them away and, hopefully, the problem should be solved. It's easy enough to make a couple more sachets every few months. :) This morning, when we took the bag to school and attached it to her desk chair, it (and her shoes) already smelled nice. The scent isn't overpowering or too flowery, either.

I was pleased with how this project turned out, but it was a lot more time consuming than I expected. I sure hope this bag makes it through the entire year, and it'd be real nice if it survived a few years!

Thanks for stopping by, and have a wonderfully crafty day!

I'd like to enter this in the following challenge:

Thanks for visiting my blog!
To have Ink Up delivered to your inbox,
subscribe in the box at the top right of the page.

Before and After

Hi Friends! I mentioned awhile back that I had organized my craft room (again!), and now I've finally gotten my pictures edited enough to post. I'll go ahead and get the embarrassing photos out of the way...the BEFORE shots.


I had so much stuff on my table, it was nearly impossible to work at it anymore!


The area just inside the door had become my catch-all. The baskets were full of fabric, patterns, cards, and anything else that would fit that I didn't feel like putting away. Those shipping boxes were scrap I was saving for the cardboard.
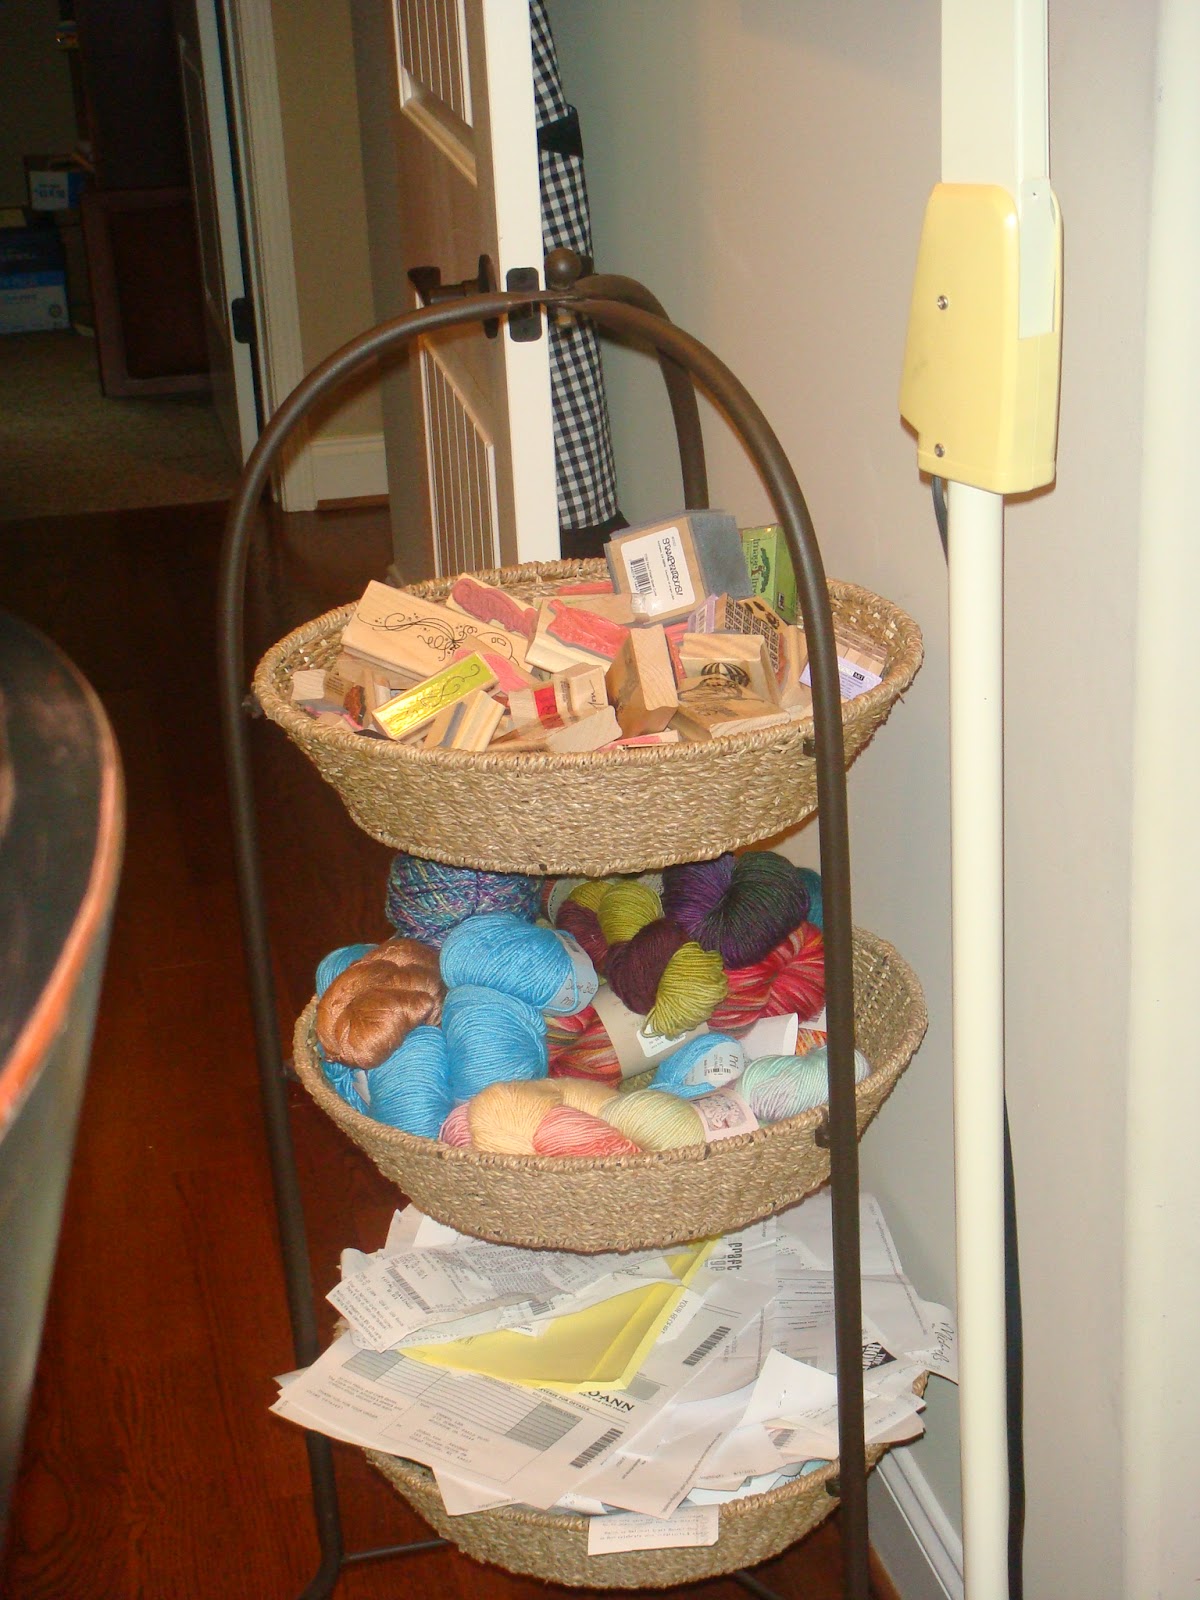
This stand is so pretty, but with a zillion receipts in that bottom basket, it was an eyesore. And, I still needed to pack up all my yarn, including all this pretty sock yarn.


Lots of yarn still inside the upper cabinets, and those white plastic drawers taking up all that counter space hold 12x12 paper and scraps. The blue baskets hold 6x6 paper pads. Way back in the corner you can see some of my knitting needles.

As you can see, I wasn't very good at putting things away when I was done. It just kept piling up with every card I made.


This is where I do all my die cutting, paper scoring, and where I store my scissors, use my computer, and play my cd's. A lot going on. All those boxes in the corner are empty--I'm just saving them in case I ever think of something to do with them!

My sewing area isn't too bad. Those clear boxes on the slat wall are mostly Flourishes stamps. I haven't gotten around to organizing all my stamps yet. The jumble of wires to the left of the sewing machine is the compressor for my Copic airbrush, and the lazy susan to the right of the sewing machine has Sparkly Fluff on top and sewing thread on the bottom. Not a very logical arrangement, in my mind.

The giant blue binder holds all my dies. The smaller binders against the wall are stamps. The pile of plastic to the right of the die binder are plastic envelopes I intended to use to store stamps, but never got around to actually doing it.


Whew, thank goodness that's over. I don't know how I stood working in all that mess. So, while my craft room is a continual work in progress, here's what it's like now. The AFTER photos! (Warning: this is very photo heavy!)

I turned my table so that any mess work-in-progress is not instantly visible from the door. I also removed the tall revolving stand. It was nice, but I couldn't stand how it overpowered the table. All my yarn is now bagged and on top of the wall cabinets instead of taking up room inside them


This is my view now when I'm working at my table--clean and neat.


This rolling cart used to sit in a corner half empty. Now it holds the things that used to be on that bulky revolving tray on top of the desk.


I keep my most used inks on the top of the cart, along with white and clear embossing powder.


Stickles and embossing powder are in one drawer, and Flower Soft and Sparkly Fluff are in another.
All that cardboard I had piled up...I cut it into manageable sized pieces and store it in one of the other drawers.

There are four very deep, large drawers right behind the table. They were so junky, I didn't even bother taking before photos of them, but lookie here:


The top drawer holds almost all my ribbon now, organized mostly by color. Before, it was all over the place.


The second drawer has the rest of my ribbon, my reinkers, extra glue, baggies, and other random things I need from time to time.


The third drawer has always held my punches, but I had pretty much just dumped them in there. Now I have boxes to separate them into categories--circle punches, ovals, McGill flower punches, Martha Stewart, hole punches, Corner Chomper and paper crimper, and my EK Success punches are all lined up so I can see every one of them!

The fourth drawer holds miscellaneous extra items and beading supplies.


Beside those drawers are two sets of cabinets. The one on the left used to hold solid color cs, felt, and foam sheets. Now it holds two of those 3-drawer units with 12x12 paper in them (I left the third unit on the counter for scraps), and I also have my white cs in this cabinet. I am storing my 6x6 pads on the bottom shelf, along with my solid color cs. The right-hand cabinet, which is directly underneath my Sizzix, has a basket with all my embossing folders in it, my old paper cutters, a box of clear bags for storing my finished cards, and the bottom shelf is full of the extra things I had left over after getting organized.


Above those cabinets is where I cut, score, and use my Sizzix. Notice that all that yarn is gone from the upper cabinets! :)


I found this awesome cabinet at Northern Tool. It's by Stack-On. Perfect for storing eyelets, brads, and other tiny embellies. There are 60 drawers, but I also ordered dividers for the drawers, so there are 120 compartments in all!!!


This pretty metal cabinet came from Hobby Lobby. I have my rhinestones, pearls, chipboard die cuts, and twine stored here.


The sheep picture is from my knitting days. I took it at a sheep shearing in 2008.

I love Mason jars! They are inexpensive and good for so many things. It's great that I can use my buttons as part of the decor in my craft room now. I bought white plastic lids rather than use metal lids, and eventually, I plan to store the jars on their sides in some kind of caddy system similar to a wine rack.

The jars are great for storing flowers, too! Same plan for storing them on their sides someday.
I've got all my electric tools stored above my Sizzix and air compressor. The plastic storage unit is from The Container Store. I think it is supposed to be a shoe storage unit.

After over a year of having to wrap gifts among all my card paraphernalia, I finally have my wrapping station back again. Since all my card ribbon is in a drawer, I was able to put my gift wrap ribbon back on the pole! I love the pull out tray under the wrapping paper. It's big enough to wrap some pretty large gifts on.


And, just under the wrapping station I store scissors, tags, extra tape, and extra wrapping ribbon, but I had one drawer that was empty, so I used it to store all my Sizzix dies! 


This is just to the left of the wrapping station. It is the corner where I used to keep the cd player and lots of junk. Now I store my air compressor there and have room to use my computer. 


To the right of the wrapping station are my stamp binders, alcohol inks, and Copic refills.

The upper cabinets hold my Distress Ink blending block set, bow maker, and tape in one cube, and a box that holds my newest stamp sets (I still need to get my stamps organized, but that will be at a later date) and my Taylored Expressions Key Ingredients kits in another cube. 


These are my finished cards, sorted by occasion.


My sewing area can actually be used to sew now! 
Tomorrow, I'll show you my latest sewing project: a chair backback! 

Nice and neat!


It was amazing to see that I could store all that fabric in this little bitty basket once I got it all folded up. The patterns are for American Girl and Barbie doll clothes.


All this stuff is for sewing, which I don't do very often anymore, except for on my cards.
When my DD saw how great the craft room looked, she even cleaned her stamp area up, too! She took that revolving tiered tray for her ink and glitter glue, and loves it. 

And, finally, I don't normally put pictures of my DD on my blog, but this picture is almost six years old, so I think it's okay. ;) It's one of my favorite pictures of her, and it's probably exactly what I looked like when I was  finally finished cleaning up my craft room! :D
Don't you know I was happy!!!

Thanks for stopping by and for sticking with me till the end! Have a crafty day!

~Hugs,

 
Thanks for visiting my blog!
To have Ink Up delivered to your inbox,
subscribe in the box at the top right of the page.