Showing posts with label Christmas. Show all posts

Paper Sweeties December 2015 Inspiration Challenge

Tuesday, December 1, 2015

Ready for one more Paper Sweeties challenge for 2015? This one is easy...it is a Christmas-y palette that is perfect for making at least one more Christmas card in time for mailing. I decided to go with a Vintage/Shabby Chic look for my card.
If you haven't seen the newest release at Paper Sweeties, you seriously need to check it out, and as a special treat, ALL of the December New Releases are available starting TODAY! That's right! You don't have to wait until the 15th! I especially like the new Dear Santa set because of the sweet little stocking stamps and matching Sweet Cuts dies. For this card, I die cut the stockings in patterned paper, then cut just the cuff portion in white felt, and finally stamped the goodies inside the stocking onto white cardstock, colored them with Copics, and did a little fussy cutting. After inking the edges of the stockings with Black Soot ink, I glued the felt to the goodies, then glued both to the stockings, and popped them up onto a white embossed rectangle with foam tape. Super easy to do, and I love the texture. The rest of the card went together easily. All the pieces, except the white panel have black ink sponged along the edges. The bow is made with Paper Sweeties Tea Seam Binding, and the bling are Paper Sweeties sequins in Black Cherry, Frosting, and Gold, with the centers filled with Lime Green Stickles.


Isn't the challenge graphic fabulous! It just gets you in the joyful Christmas spirit!
I had a lot of fun creating the inside of the card, using ornament designs from the Homespun Holidays Sweet Cuts Die set, and Paper Sweeties Licorice Baker's Twine. The stocking sentiment is from the Dear Santa stamp set and the Christmas Blessings sentiment is from the Homespun Holidays stamp set. Hmmm, I think I'm going to do this again but use it as the front of a card! 

Swing by each of my teamies' blogs for some great inspiration, then create your own design for the challenge. The challenge runs for the entire month of December, and if you use Paper Sweeties products on your project, you get an extra vote. Wouldn't it be great to start the new year with a $20 Paper Sweeties Gift Certificate! 

Cheryl Lea - That's Me!
Debbie Marcinkiewicz – Paper Sweeties 
December Guest Designer:  Tracey Kelly

Thanks for stopping by, and have a blessed week!

I'm entering this card in the following challenges:
Viva la Verve November 2015 Week 1 Sketch Challenge
Simon Says Stamp Wednesday: Anything Goes
TCP Tuesday Challenge #304: Anything Goes
Sweet Stamps November Anything Goes Challenge

~Hugs,

Supplies Used:

Thanks for visiting my blog!
To have Ink Up delivered to your inbox,
subscribe in the box at the top right of the page.

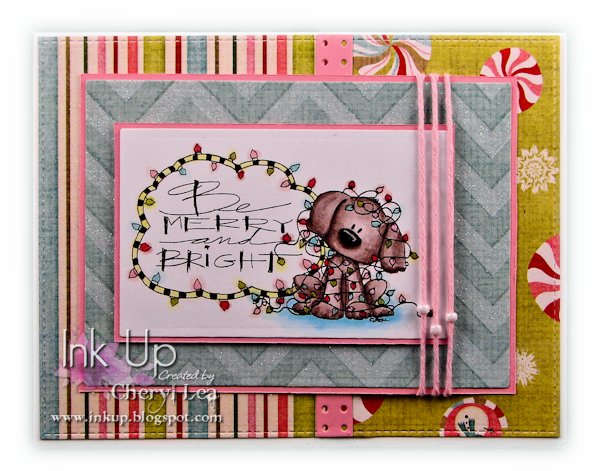
Be Merry and Bright Card Set

Friday, November 27, 2015

I hope everyone had a Happy Thanksgiving yesterday. Are you still sleeping off all the turkey and trimmings? I definitely ate way too much! ;)

A friend saw a card I made last year and asked me to duplicate it as a card set. I'm not good with making multiple cards exactly alike, and I have almost completely lost my cardmaking mojo since saying goodbye to my little Silkie, Ozzy, 2 weeks ago, so I wasn't sure I would be able to do it. Ozzy was always underfoot when I worked in my craftroom in the middle of the night, and it's just not the same without him around. Since I haven't been able to find my get-up-and-go to design any cards at all, I thought CASing my own card a few times might help me get back in the groove again. 
Here's the entire set. I basically just chose four different groupings of paper, twine, and beads, then colored the image to match it's card. I like how they turned out. You can't tell in the pics, but all the Christmas lights have clear Wink of Stella sparkling on them, and the little puppies' noses are all dimensional with Glossy Accents. Close ups of each one follow:
I didn't take pics of the insides, but they all have the same sentiment and 3 flags in the corresponding papers either sewn or stapled to the card. If you want to see an example of what I did, I do have a pic of the inside of my original card here.

While I haven't made any cards in a few weeks, I have been busy making books. Now that I don't have to reference a book or video every time I want to make a book, I can make them without having to concentrate a lot, for most of the process. I'll post pics of them soon.

In the meantime, thank you for visiting my blog today, and BIG HUGS to all my Paper Sweeties Design Teammates, Facebook friends, and real life friends who have sent me such wonderful messages of condolence. I know Ozzy was "only" a pet, but, to me he was as much a part of my family as anyone else in it, and if you've ever lost a beloved pet, I know you understand how devastating it can be. :'‑(

Have a wonderful weekend!

I'm entering this card in the following challenges:
Simon Says Wednesday Challenge: Anything Goes
Your Next Stamp Color Challenge #28 (the first card fits the challenge)
Sugar Pea Color Challenge #7: CCC7 (the first card fits the challenge)
TCP Tuesday 304: Anything Goes
Tiddly Inks Challenge #171: Anything Goes!
The Paper Shelter Challenge #229: A Christmas Card
DoubleClick Skittles Challenge: Christmas Holiday Challenge
Sweet Stamps November Anything Goes Challenge

~Hugs,

Supplies Used:

Thanks for visiting my blog!
To have Ink Up delivered to your inbox,
subscribe in the box at the top right of the page.

Paper Sweeties November Release Countdown!

Saturday, November 14, 2015

Have you started your Christmas countdown yet? Too early? Good! Then, you still have time to make your very own Christmas Advent Calendar! Here's a look at mine, made using Paper Sweeties new Days Until stamp and Sweet Cuts die sets that will be available in the Boutique starting tomorrow ...
This calendar was one of my happy accidents, where I started out making one thing and ended up with something I never could have dreamed up if I was trying. I originally intended to make a Christmas card using the "Days Until" stamp and die sets, and I got it in my head that I wanted to use corrugated cardboard on it somewhere. But, by the time I finished doctoring up the cardboard, I had smooshed it flat and got so frustrated I almost threw it away, when I realized the flattened cardboard looked a little like a shutter, and it might hold numbered squares the same way people display their Christmas cards on a real shutter. And, sure enough, it worked!
The "doctoring" I did was to add red, green, and gold Inka Gold to the flutes. To get the nice metallic Inka Gold sheen, it has to be burnished with a paper towel or cloth, which, of course, flattened it. 

Once the cardboard is flattened, the rest of the project is pretty straightforward. I distressed the edges of a piece of peppermint patterned cardstock with gold Inka Gold and black acrylic paint, then adhered that, and the cardboard piece to strips of black cardstock, leaving small black borders around each. A 1/8" black border around the peppermint piece is sufficient to be able to glue the flourished pieces to the top and bottom of the project. Those pretty flourishes are also part of the Days Until stamp and die sets, as is the "Days Until" text.

For the numbered date squares, I just stamped 24 squares onto a piece of cardstock, then stamped the numbers into the squares. A square die, exactly the right size for these squares is part of the Days Until Sweet Cuts die set. Debbie thought of absolutely everything when she created this fun set!

I added a chipboard easel stand to the back of this piece so it could stand, but I had to trim a little off the bottom of the stand to allow it to lean back more so the squares wouldn't fall out. (If I made this project again, rather than using corrugated cardboard, I would probably just fan fold a strip of kraft cardstock instead, which would create a deeper channel to put the squares in, so they would stay in better.)

To have a place to store the numbered squares as they are removed, I made a tiny cardstock box, glued a metal washer to the inside center bottom and added an earth magnet to the side of a chipboard easel stand so the box could be attached, but removed easily every day to add another square.

Most advent calendars I have seen have a whimsical look to them. I love that this one is more elegant. It fits right in with the rest of my Christmas decor!

Now, you seriously need to visit the rest of the Paper Sweeties Design Team for inspiration for everything from cards to home decor! There's even another countdown calendar, too! They have really gone all out for this release!


Thanks for stopping by, enjoy your weekend, and get your ready to shop in the Paper Sweeties Boutique first thing tomorrow! I predict this release is going to sell out fast!

~Hugs,

Supplies Used:

Thanks for visiting my blog!
To have Ink Up delivered to your inbox,
subscribe in the box at the top right of the page.

Paper Sweeties November Release Sneak Peeks!

Friday, November 13, 2015

With only 42 more sleeps until Christmas, it's about time to be thinking about Christmas cards, and the November New Release stamps and Sweet Cuts dies at Paper Sweeties are just in time to help you get your Christmas cards made.
I used the adorable new stocking die in the Stitched Tags #3 Sweet Cuts Die Set for this card. I cut the stocking once in red and once in white, then put the white cuff on the red stocking. I embossed the stocking and added a Snow Marker to the cuff for lots of texture. I love that the die set includes the dainty hanger, too. The stocking is hanging from a "garland" cut from the new Dear Santa Sweet Cuts Die set, and the sentiment is from the coordinating Dear Santa Stamp Set, also.
The sentiment on the inside is from a previous stamp set, Ho Ho Ho. I stamped it in red, then colored in the letters with Spica pens.

Be sure to check out the creations from the rest of the DT for tons of inspiration.


We'll be back tomorrow for our Countdown posts, and I can't wait to share my "Countdown" project made with the new Days Until Stamps and Sweet Cuts Dies.

~Hugs,

Supplies Used:

Thanks for visiting my blog!
To have Ink Up delivered to your inbox,
subscribe in the box at the top right of the page.

Paper Sweeties October Release Rewind!

Friday, October 16, 2015

Time for a Paper Sweeties Rewind, where we mix new release stamps and dies with older ones. Abigail and Jake stamps and dies were perfect, paired with the Do You See What I See and Reason for the Season stamps sets.

I used a mix of Dylusions Ink Sprays and Distress Ink to create the background on a Manila tag. Then, I heat embossed the sentiment, first with a gold mirror embossing powder, then again, offset slightly, with a light brown ep. Jake, Abigail, and baby Jesus were colored with Copic markers, and the outfits were paper pieced. Abigail is popped up slightly, but I wanted to keep the tag as flat as possible in case it ended up being used as a bookmark. The edges of the tag were heat embossed with two different Fran-tage embossing powders, and I finished the tag off with several Paper Sweeties seam bindings and baker's twines.

Be sure to visit my teamies' blogs, too!

You still have time to enter this month's Inspiration Challenge!

http://papersweeties.com/blog/paper-sweeties-inspiration-challenge-october-2015/

And, be sure to check out the October Kit of the Month, too.

<DSCN3109


Thanks so much for your visit, and enjoy your weekend!

I'm entering this card in the following challenges:
~Hugs,

Supplies Used:

Thanks for visiting my blog!
To have Ink Up delivered to your inbox,
subscribe in the box at the top right of the page.

Paper Sweeties October Release Party!

Thursday, October 15, 2015


Paper Sweeties Release Party is here, which means that all the new Paper Sweeties October stamp sets are available in the Boutique starting right now!  And, here's another Christmas card created with the newest Sweet Cuts die set, Stitched Tags #2.
After painting corrugated cardboard with white acrylic paint, I die cut the tree in the center. For the colorful tree inside, I happened to have some 12x12 patterned paper with large Christmas trees on it, so I just cut the tree from that. For the shaker, I used my Fuse tool to create a shaker pouch from a sheet protector and filled it with Frosting and Sugar Sprinkles sequins and Fran-tage Shaved Ice. I like the way acetate sheets look for shakers, but I have to tell you, using a plastic pouch is much easier because you can fill it before putting it in the card, and to attach it, I just die cut a tree from a second piece of cardboard, then sandwiched the edges of the pouch between the two cardboard layers. After adhering those layers to a red and white dotted background paper, I made a green bow with Green Apple Seam Binding and Peppermint Baker's Twine, both available at Paper Sweeties, and added a few Strawberry sequins around the card, filled with White Opal Liquid Pearls. Finally the star tree topper was cut with the star die in the Trim the Tree Sweet Cuts set, and Diamond Stickles gave it plenty of sparkle.
On the inside of the card, I stamped a sentiment from the new Do You See What I See stamp set, colored the heart with a Copic marker, and used a paint pen for the highlight. The distressed cardboard Christmas tree is the die cut from the front of the card.

The Paper Sweeties DT has more inspiration for you. Just click on each of the names to see what they've been busy doing lately.

Release Week always ends with a Rewind day. Check back tomorrow for Rewind Day, to see one last project featuring the newest releases from Paper Sweeties.

I'm entering this card in the following challenges:
613 Avenue Create Challenge #145: Anything Goes
House of Cards October Challenge: Add Texture &/or Color Inspiration
Craft Your Passion Challenge #283: Always Anything Goes
TCP Tuesday TCPTUES301: Anything Goes Challenge

~Hugs,

Supplies Used:

Thanks for visiting my blog!
To have Ink Up delivered to your inbox,
subscribe in the box at the top right of the page.
Paper Sweeties October Release Countdown!

Wednesday, October 14, 2015

Day 2 of Paper Sweeties' October New Releases is here, and I've got a bright and cheery Christmas card to share with you. 
This card was so easy to make, and unlike most of my cards, it has no coloring (except for tiny hearts inside). The mitten tags were die cut from the new Stitched Tags #2 Sweet Cuts die set, and I added black faux stitches with a Sharpie marker, and some Strawberry and Green Apple Seam Binding. The sentiment is from the O' Christmas Tree stamp set, and was heat embossed with white ep. A few Sugar Sprinkles Sequins add the requisite sparkle.
I love the simple Peace Love Joy sentiment with those sweet little hearts that I colored with a red Copic marker. It's out of the new Stand Add On: Manger stamp set.

All the new October new release stamps and dies will be available in the Paper Sweeties boutique beginning tomorrow!

My Paper Sweeties teamies have more inspiration waiting for you on each of their blogs:


Have you entered this month's Inspiration Challenge yet? There's still time!

http://papersweeties.com/blog/paper-sweeties-inspiration-challenge-october-2015/

And, be sure to check out the October Kit of the Month. Aren't these cards adorable!

<DSCN3109

I'll have another Christmas card tomorrow. Hope to see you again, then.

Until tomorrow,

I'm entering this card in the following challenges:
613 Avenue Create #145: Anything Goes
Craft Your Passion Challenge #283: Always Anything Goes
Simon Says Wednesday Challenge: Clean & Simple Christmas

~Hugs,

Supplies Used:

Thanks for visiting my blog!
To have Ink Up delivered to your inbox,
subscribe in the box at the top right of the page.

Paper Sweeties October Release Sneak Peeks!

Tuesday, October 13, 2015

Hello all my crafty friends! I hope you had a fun, long holiday weekend. We topped ours off with a trip to a local farm with our homeschool group and had an amazing day! 

And, now, since it's mid-month, it's time for Release Week at Paper Sweeties! Yay! Here we go....
I used the new stamp set, Stand Add On: Manger to create this Christmas card, and used kraft cardstock, in keeping with Paper Sweeties October Inspiration Challenge, which you still have time to enter. I stamped the images, including the star from the new Do You See What I See stamp set, onto kraft cs, then colored them with Prismacolor pencils, adding Stickles to the halo. The star was heat embossed with glitter ep. For the background, I cut a kraft distressed rectangle, then inked up a woodgrain embossing folder with Fossilized Amber on one side and Walnut Stain on the other, spritzed them with water, then sandwiched the kraft cs, and embossed it. I used Paper Sweeties Tea Seam Binding and Cookie Dough Baker's Twine for the bow, and added Gold and Frosting sequins for a starry night sparkle. The vellum banner, from the Hello Friend stamp set, was heat embossed with clear ep, and the sentiment was heat embossed with black ep. I used the Be Happy Sweet Cuts die set to die cut the banner. 
The inside sentiment panel was sponged with Fossilized Amber and I did a little masking to stamp two straw images together. The sentiment, from the new Do You See What I See stamp set, was stamped, then I colored in the "Christmas" text with a Garnet Spica pen. I hand-doodled the brown border with a fine-tip Sharpie marker.

Now, prepare yourself to be wowed by the rest of the Paper Sweeties team!


As I mentioned earlier, there is still time to enter this month's Inspiration Challenge.

http://papersweeties.com/blog/paper-sweeties-inspiration-challenge-october-2015/

And, be sure to check out the October Kit of the Month. Aren't these cards adorable!

<DSCN3109


Thanks for stopping by! Hope you'll come back tomorrow for another sneak peek. Here's a little teaser for ya...


Until then,

I'm entering this card in the following challenges:
613 Avenue Create #145: Anything Goes
Penny Black October Challenge: Warm Autumn Colours
Craft Your Passion Challenge #283: Always Anything Goes
House of Cards October Challenge: Add Texture &/or Color Inspiration

~Hugs,

Supplies Used:

Thanks for visiting my blog!
To have Ink Up delivered to your inbox,
subscribe in the box at the top right of the page.

Warm Cocoa Wishes

Friday, December 19, 2014

This past week, my daughter and I have both been feeling puny, and warm cups of hot chocolate were very welcomed by us! So for my Tiddly Inks Fabby Friday post, I decided to use the adorable Cocoa Wishes image and girly colors for a fun seasonal card. 
I colored little Wryn up with copics, fussy cut her, then popped her up with some foam tape. The card design is from this week's Your Next Stamp Sketch & Color Challenge. I cut the text out of heavy glitter paper.

Sadly, my time is up on the Tiddly Inks DT, so this will be my last post for them. There should be another DT call soon, for the next season, so be on the lookout. I highly recommend this DT for anyone interested in DT assignments. Christy, and the entire team, is amazing, and I enjoyed every minute I was there.

Be sure to stop by Tiddly Inks and see what the rest of the DT has for today's post. As usual, their creativity and talent will blow you away!

Thanks for stopping by, and have a wonderful weekend!

I'm entering this card in the following challenges:
YNS Sketch & Color Challenge #4
Simon Says Monday: Anything Goes
Simon Says Wednesday: Winter Inspiration
613 Avenue Create #102: Anything Goes
Sugar Pea Designs SPD12: Anything Goes
Chocolate, Coffee, & Card Challenge #80: Christmas
Corrosive Challenge #214: Anything Goes
Robyn's Fetish Challenge #242: Winter Cards with Glitter
The Shabby Tea Room Week #242: Shabby Chic Holiday
TSC Challenge #60: Anything Goes

~Hugs,

Supplies Used:

Thanks for visiting my blog!
To have Ink Up delivered to your inbox,
subscribe in the box at the top right of the page.

One Sheet Wonder Christmas Card Set

Thursday, December 18, 2014

My favorite way to start a card is with a sketch, and Viva la Verve has a sketch challenge for December that I couldn't pass up--a One Sheet Wonder Challenge.


I had never even heard of something like this before, so I was interested in seeing if I could do it. I decided to go for a vintage look using some Tim Holtz Blueprints stamps, colored very roughly with Copics. My supply list is at the end of the post.


I didn't take a photo of the inside, but each card is stamped with the same Christmas sentiment.

This was definitely a challenge for me, and it was pretty cool to use every single inch of a 6x6 piece of paper, but I think I prefer winging it when I make cards, even if it means there is a little waste involved. ;~)

Thanks for stopping by, and have yourself One Wonder-ful weekend!

I'm entering these cards in the following challenges:
Viva la Verve December 2014 Sketch Challenge
Simon Says Monday: Anything Goes
Simon Says Wednesday: Winter Inspiration
613 Avenue Create #102: Anything Goes
Sugar Pea Designs SPD12: Anything Goes
Chocolate, Coffee, & Card Challenge #80: Christmas
Corrosive Challenge #214: Anything Goes
Robyn's Fetish Challenge #242: Winter Cards with Glitter

~Hugs,

Supplies Used:

Thanks for visiting my blog!
To have Ink Up delivered to your inbox,
subscribe in the box at the top right of the page.

Winter Blues Tiddly Inks Challenge

Tuesday, December 9, 2014


Got the winter blues? Well, why not channel that into a fun challenge--Tiddly Inks Happy Winter Blues Challenge!  
The Faythe Gives image I used on this card was so much fun to color with my Copics. I loved adding all the lumps in her sack and the folds and gathers in her dress and hat, and it's always challenging, in a good way, of course, to use non-traditional colors at Christmastime. Can you see the 3-D fur on her hat and dress? I used my Snow Marker there. That stuff is fantastic!
The inside of the card has a simple sentiment and several circular layers. I like to have sparkle somewhere on my cards when I can work it in, so I added Diamond Stickles to the white snowflake layer, and colored the little ornament stamp with silver and gold Wink of Stella markers.

Make sure you check out the rest of the DT's happy work, then grab something blue and link up your own creation to the Winter Blues challenge! This is the last Tiddly Inks challenge of 2014, so if you miss it, you'll have to wait until January for the next one! ;)

Thanks for stopping by, and have a Happy Winter day!

I'm entering this card in the following challenges:
Deconstructed Sketch No. 178
Simon Says Wednesday Challenge: Christmas/Holidays
613 Avenue Create Challenge #101: Anything Goes
Sugar Pea Designs Challenge SPD11: Winter Wishes
Corrosive Challenge #214: Anything Goes
Robyn's Fetish Challenge #241: Christmas Cards
Fresh Brewed December Challenge: Christmas Anything Goes

~Hugs,

Supplies Used:

Thanks for visiting my blog!
To have Ink Up delivered to your inbox,
subscribe in the box at the top right of the page.