Showing posts with label congratulations. Show all posts

Paper Sweeties March Inspiration Challenge #29 - 'Waiting For Spring'

Sunday, March 1, 2015

It's the first of the month, time for the Paper Sweeties Inspiration Challenge, and I'm SO excited to share my first post as a member of the Paper Sweeties Design Team! This month's challenge is "Waiting for Spring."


I used Paper Sweeties' newest stamp releases, Pretty Posies and Garden Time for my card.
I stamped the flowers three times for each flower and fussy cut them so I could shape them into 3D flowers, added Diamond Stickles to the edges of each layer, and sequins, from the Sweetheart Mix, to the centers, finally putting a dot of Stickles in the center of each sequin. I stamped the flower pot onto designer paper and drew vertical lines from the curly border to the bottom, then added shading with a gray Copic. For more dimension, I also creased the flower pot along each of those vertical lines, which curved the pot. 3D glue is helping the pot retain it's shape. 
I stamped the flower on the inside of the card, too, and added just a little bit of Copic coloring to the flower and leaves. Magenta Stickles is in the center of the flower.

All that sparkle is for a reason...Paper Sweeties is helping Cupcake Inspirations celebrate their 300th challenge, and the first day's challenge is a Sparkle Challenge. It's hard to see in the photo, but I've not only added sparkle to the flowers, but also to the background. Every single raised dot on the white embossed background sparkles, too! Congratulations Cupcake Inspiration!


Be sure to check out the rest of the Design Team for more Spring Inspiration:

Cheryl Lea (you are here)
February Guest Designer:  Donna Baes

Thanks for stopping by, and have a sparkly week!

I'm entering this card in the following challenges:
Cupcake Inspirations 300th Challenge Celebration: Sparkle Inspiration
Simon Says Wednesday Challenge: Anything Goes
613 Avenue Create Challenge #113: Anything Goes
Color Throwdown #331
The Paper Players - Laurie's Theme Challenge PP234: Think Spring

~Hugs,

Supplies Used:

Thanks for visiting my blog!
To have Ink Up delivered to your inbox,
subscribe in the box at the top right of the page.

Picture Perfect

Tuesday, April 29, 2014


I don't seem to need much sleep. I often craft the night away, sometimes not stopping until it's time to get ready to take my daughter to school the next morning! But, I spent a lot of time keeping an eye on the weather radar last night as the storm went through here, and that was exhausting! So, I'm making this post very short so I can head off to bed before the next round of storms starts again in a few hours.
I've had this Picture Perfect Marci La-La Land image for quite awhile, but haven't used it until now because I wasn't sure I'd be able to color it well enough to actually be able to use it on a card. But, I've kept it on my craft table ever since I got it; because it's so cute, I knew I would eventually want to ink it up. And, I'm glad I did, as it was really fun to color. She is colored with Copics and her shirt and shorts (or is that leggings?) are paper pieced. I used a gold Spica pen on the frame. 
The "Picture Perfect" sentiment is from the Picture Perfect stamp set, and the "amazing" sentiment is a CAS-ual Friday stamp.

If you are in the path of tonight's round of storms, stay safe! Thanks for stopping by, and have a wonderful week!

I'm entering this card in the following challenges:


~Hugs,

Supplies Used:

Thanks for visiting my blog!
To have Ink Up delivered to your inbox,
subscribe in the box at the top right of the page.

You Make Me Smile

Friday, September 27, 2013


Hello, and Happy Friday! I hope you had a fab week and are looking forward to an even better weekend! I'm going to be brief here, as I have two more cards to post in a little while. This card was pretty simple to put together, so I won't go much into what I did. The card recipe is at the end of the post.

I made this card for my DD, who recently had her first AR celebration. She earned a whopping 440 points! It took her about 3 months to do that last year! Needless to say we are really proud of her.
I love this sweet image, and it colored up nicely, but I have to confess that the "dirt" was not my original intention. I've been working on my shading, and it didn't go too well on this image, so rather than have it look like bruises, I turned my mess into dirt. It ended up being cute, but for a sec there, I thought I was going to have to start all over! :) I used a sketch from the September 2013 Week 2 Viva la Verve Sketch Challenge for the layout of the card.

The swirl background on the inside of the card was made with Faded Jeans Distress Ink and a swirl stencil.

That's it...short and sweet! I'll be back later with another card. 

I'm entering this in the following challenges:
Viva la Verve Sketch Challenge VLVSep2013, Week 2

~Hugs,
 
Supplies:
Thanks for visiting my blog!

To have Ink Up delivered to your inbox,

subscribe in the box at the top right of the page.

You Glow Girl

Friday, May 17, 2013

Happy Friday! Are you ready for the weekend? I sure am! We've got a big 25th anniversary celebration going on at church tonight, and my daughter is having a skating birthday party on Saturday (her birthday is actually July 5, but it's almost impossible for her to have a party in the middle of the summer with everyone on vacation, so we're celebrating early this year.) On top of that, school is out for the summer this coming Wednesday, so everybody is happy around my house! :)

My DD had a fantastic 3rd grade year, breaking the school record again in Accelerated Reader points, and exceeding expectations in every area on the standardized tests given at the end of the year. We are always so proud of her, and I made this card to give to her after Awards Day next week. She likes all my cards, but she especially likes the colorful ones, so this one should be perfect.

The sunflower was stamped in a light tan color so I could try my hand at no-line coloring with my Copics. I've attempted this kind of coloring before, without much success, but I did okay with this one. For the center of the flower, I added teeny little black pearls with a Pearl Pen. After I fussy cut the sunflower, I adhered it to the green circle, lifting up the top edge with layers of crimped cs. The sentiment is heat embossed.

There is a little bitty ladybug stamp in the Sunflowers stamp set, and I couldn't resist using it. I stamped it onto red cs, cut it out, then coated it with Glossy Accents. It almost looks like a real ladybug on the card.

Here's a look at the layers of the card, including the partially popped up flower.

I love this quote, and it seems so fitting for the occasion. ;)

Well, that's it for me for a few days. Thanks for stopping by, and go have yourself a fantastic weekend!

I'm entering this card in the following challenges:
Viva la Verve May 2013 Week 1 Sketch Challenge (VLVMay2013)
Color Throwdown #242
Simon Says Stamp & Show Challenge: A Little Paper
Simon Says Stamp Challenge: Flower Power

~Hugs,

Stamps: Sunflowers (Flourishes); Follow Your Heart (Impression Obsession)
Paper: Hello Summer (Echo Park); Journeys (Kathy Davis)
Ink: Copics; Distress; Memento; Versamark
Dies: Classic Rectangles Lg & Sm, Std. Circles Lg, Classic Scalloped Circles Lg
Accessories: Daisy edge punch (Martha Stewart); Zigzag Chain edge punch (EK Success); Glossy Accents); embossing powder (Ranger); pearls (Prima); Pearl Pen; sewing thread
Size: A2 (4.25" x 5.5")
Thanks for visiting my blog!
To have Ink Up delivered to your inbox,
subscribe in the box at the top right of the page.

TMS#167: Girl on Fire!

Tuesday, October 9, 2012

Hi Friends! I'm so glad it's Tuesday! And, especially that it's this particular Tuesday. Because, not only is it the day we have another sketch for Tuesday Morning Sketches, but our sponsor this week is Sassy Studio Designs, and I LOVE all their digital images! The digi stamp I chose to use for today was so much fun to work with! Just from the title of my post and the teaser photo here, you probably already know who it is, don't you? ;)

That's right, Hunger Games fans...it's Katniss, the Girl on Fire!!! I loved the trilogy, and the movie was fantastic! They're filming the second movie right here in Atlanta. I would so love to be able to be part of that. Anybody got any strings you could pull for me? Could the odds be "eva in my fava?" I fetch a mean cup of coffee. :)

But, I digress. Let me get back to the card. If you've read the books or seen the movie you know about the "girl on fire" scene. Well, for those of you who don't, Katniss has a dress that is rigged up so that when she twirls, it appears that the bottom of it is in flames--a very cool scene, which I tried to capture on the image by coloring the dress red, then adding orange and yellow over the bottom ruffles and outlining them in those colors, too. I used the out-of-the-box technique to die cut the circle and fussy cut the bottom of the dress and top of her head. I was really pleased with how my coloring turned out on this image. I have been practically drooling over the amazing coloring that Shelby and Carla do on their images, and learning to color folds is something I've been working on for awhile. I think I did okay on this one. It literally took me about four hours to get this fiery beauty colored to my satisfaction! I added Stickles to the image a few days after making the card. I was afraid it would completely mess up all my coloring, but since it's supposed to look like fire, I like how it turned out.

Here's what it looked like before Stickles. What do you think--better with or without the glitter???


You probably noticed that there is a bow on the Tuesday Morning Sketch this week. Well, Katniss is definitely NOT a girly-girl, so I left it off, and instead I offset the image layer and put a graduated line of red rhinestones along the left side of it. That's a little more in line with her kick-butt personality! :)

Here's a close up of her "makeup." I added Glossy Accents to her lips. And, as in the movie, Katniss has rhinestones along her shoulder and back, as well as lots of sparkle on her face. For purists, I think the rhinestones were on the other shoulder. ;)

I continued the "fire" theme on the inside of the card, sponging inside the die with several colors of Distress Ink, then I created the sentiment in Word, using a font called "Cheap Fire." I used a rim of red Stickles around the entire circle die cut. IRL they are a very bright, vivid red, but I just couldn't get the color to show up right in the photo. 

At the first AR (Accelerated Reader) party of the year at my DD's school, she surprised everybody (including me) by having more AR points that anyone in the school! She has done that for the past two years, but this year she is competing against 4th and 5th grade students (she's in 3rd), so we knew it would be tough. She's working hard to keep her lead, and I plan to give this card to her after the next AR party. She doesn't know much about Hunger Games, but she IS a girly-girl, and she will love the beautiful girl on the card, and her fancy dress. :)

Okay, now, the info on the challenge this week. Every month TMS has a judged challenge, which includes a sketch with a twist. So, the twist this week is: The Letter "E." It can be anything--elephant, embossing, Echo Park papers, etc. For my card, I have embossed edges on my die cuts, and I used the "Earth" Copic markers for Katniss' hair. And, I know it's stretching it a bit, but I also give myself an "E for Effort" for my coloring this week! ;D What's your "E" going to be? Can't wait to find out!

So, head on over to the Tuesday Morning Sketch Challenge blog and check out the rest of the projects by our awesome DT, as well as our new Best of the Best Guest Designer, Alison. By the time you've done that, you'll be "E"nergized to create your own fab work of art. And, remember the winner gets a prize from Sassy Studio Designs! How awesome is that!!!

Thanks for stopping by today, and have a spectacular week!

I'd like to enter this card in the following challenges:

 
Stamps: Katniss Girl of Fire Sassy (Sassy Studio Designs)
Paper: Forever Fall (Bo Bunny); Shimmer Stack (DCWV)
Ink: Copic markers; Distress Ink
Dies: Std Circles Sm, Peony Nestabilities, Classic Scalloped Circles Lg (Spellbinders)
Accessories: Rhinestones; Stickles; Glossy Accents
Size: 4-1/8" dia. circle
Thanks for visiting my blog!
To have Ink Up delivered to your inbox,
subscribe in the box at the top right of the page.

TMS #162: Welcome Sweet Baby Boy

Tuesday, September 4, 2012

Hi Friends, and Happy Tuesday! Ready for another Tuesday Morning Sketch Challenge? Melissa's sketch is a great one--classy, and lots of room for your own spin. And, we've got Doodle Pantry as our fab sponsor! They have so many images to choose from--everything from cute to elegant. Just wait till you see the sweet image I used for today's creation! :)


I'm still in need of another nursery wall hanging for one of the babies getting ready to join the family.
As you can see, I followed the basic sketch, then added a few embellishments. :) For the tilted panel, I used some scrap corrugated cardboard, painted it with blue and white acrylic paint and distressed the edges. The sentiment was embossed with gold glitter ep and I edged the die cut with a gold calligraphy pen. The entire piece is mounted on a piece of chipboard that I covered on one side with a solid cs and on the other with dp (I'll show you that in a sec.) I used a Ric Rac die for the bottom edge and added small eyelets into each point, so I could add hanging stars.

The super cute Doodle Pantry image is one that is pre-colored, and the plaid background is a digi paper that actually comes with the image. The digi paper was originally pink, but this is for a boy, so I edited the color in my photo program to make it mostly blue. I used the .png digi stamp so I could layer it on the bg digi paper for a nighttime look. I love how that worked out. Stickles on the stars gave it a little sparkle.

I used a Papertrey Ink star die to cut the star, covered it with Stickles, and hot glued buttons to it for my corner embellishment.

Here's a good look at the layers. I think one of the reasons I enjoy making wall hangings so much, is that I can layer them up all I want. I don't have to worry about having to fit it into an envelope!

I glued two pieces of a beautiful yellow digi paper together and die cut six stars. Because I had so many stars to glitterize, I used Mod Podge and glitter to make my own glitter glue for these and covered both sides. They were very lightweight, so I added clear mini round gems to the center of each one, on both sides. Then, I added jump rings in various places on the stars to give them a more random look. I used some nylon beading thread to hang them from the eyelets, and placed three beads on each thread, for aesthetics, and also for a little more weight. It took me quite a while to figure out what to do about the knots and tails that were left after tying off all the stars. I could have just glued buttons over the holes, but this is going to hang on a wall and I wanted it as flat as possible on the back. Then, I remembered that I had just recently purchased button dies from PTI, and my problem was solved--flat buttons! I glued the cs buttons over the eyelet holes on the back before trimming the thread, to help insure that the thread would stay put, then used a craft knife to trim the excess thread.


Here's a look at the entire back of the wall hanging, which will also serve as my card at the baby shower. I typed the sentiment up in Word, printed it on a transparency and rubbed it onto the cs. The Congratulations sentiment is a Flourishes stamp. And, see that cute plaid dp I used for the bg? It's the same dp that I used on the front as the bg for the ant image. This time I just printed it so that the design is larger.

So, see, you can do all kinds of embellishing with this week's TMS sketch, or you can leave it as is--either way, it's up to you! I hope you'll join us this week. And, be sure to check out the rest of the DT's creations, as well as our newest Guest Designer, Iwona "Chupa" Palamountain. You are in for a real treat with this line up! 

Thanks for stopping by, and have a crafty week!

I'd like to enter this in the following challenges:

~Hugs,
 
Stamps: Crescent Moon Ants digi stamp (Doodle Pantry); Making a Statement (Verve); Wedded Bliss (Flourishes)
Paper: Crescent Moon Ants digi paper (Doodle Pantry); The Green Stack, Old World Stack (DCWV); Floriade digi paper (Two Peas in a Bucket)
Ink: Distress Ink
Dies: Classic Rectangles Sm, Fleur de Lis Rectangle; Ric Rac Edgeabilities, Labels Twenty-Five (Spellbinders); Buttoned Up #1, Seeing Stars (Papertrey Ink)
Accessories: Dots, Circles & Stars embossing folder (Sizzix); Zing embossing powder; lace; ribbon; acrylic paint; gold calligraphy pen; nylon beading thread; Mod Podge; corrugated cardboard; chipboard; mini round gems; beads; eyelets; buttons; sewing thread; twine (The Twinery); glitter; Stickles
Size: 5.72" x 5"
Thanks for visiting my blog!
To have Ink Up delivered to your inbox,
subscribe in the box at the top right of the page.

Tiny Miracle with Booties: Wall Hanging

Saturday, September 1, 2012

Hi Friends! I'm back with another baby nursery wall hanging, and I love how this one turned out.

I used the MFT Wednesday Stamp Club MFTWSC87 sketch for my layout, and the Flourishes Timeless Tuesday FTTC184 challenge to use purple and blue for my colors.


I never think of purple as a "boy color," but I added some greenish-brown elements to offset that, and then purple was the perfect accent color. A note on the purple digi paper: the paper is actually just shades of purple and white (beautiful as-is), but I needed some blue in it, so I added the blue in my photo editing software, then texturized it a bit so it wouldn't appear "flat," so you won't find this exact paper in the digi paper pack. Btw, that particular digi paper pack is one of my favs! You should check it out--it's a beautiful set.


The image is colored with Copic markers, the edges were inked with Distress Ink, and the teeny flowers in the image were colored with a white gel pen.

I really like the Hello Baby stamp set, especially because of the clothesline image, which is adorable, but those little booties are just too cute! They were the perfect embellie for the bow. I stamped them on some scrap digi paper I had leftover from an earlier project, and used a Copic marker to add a little shadow here and there. For the shoe buttons, I used Glossy Accents. To glue the shoes to the bow, I first glued a button to the back of the image, then glued the button to the top of the bow. That gave the image more strength, and also raised it up just enough to keep the bow from being squished down.

Here's a look at the layers. I didn't use any foam dots at all. Instead, I layer pieces of crimped lightweight cs, alternating the direction of the ridges to get the height I want (kind of like layering with corrugated cardboard). I have much more control over the height and also have a sturdier finished project because the entire layer is supported rather than a few spots, as with foam dots.
As with my other nursery wall hangings, this will also serve as my "card," so I decorated the back as if it were the inside of a card, keeping everything flat so it will lie flat against the wall.

That's it for me for the weekend. Hope yours is fantastic, and that I'll see you back here again next week! Thanks for stopping by!

I'd like to enter this project in the following challenges:
MFT Wednesday Stamp Club #87: WFTWSC87
Flourishes Timeless Tuesday #184 (FTTC184): use purple and blue
ABC Challenges: W for Wishes
Celebrate the Occasion Challenge #77: Child's Birthday (literally a "birth day" project)
Cute Card Thursday Challenge #232: A Stitch in Time
The Poodles Parlour: Winged Things
Stampin' Sisters in Christ Challenge #154: Use punches, dies, or shapes of any kind
Whimsy Stamps Inspiration Challenge #50: Lots of Layers

~Hugs,

 
Stamps: Hello Baby, Wedded Bliss (Flourishes)
Paper: Vintage Damask (Double Diva Design for Print Candee); Garden Party (Mye De Leon for Design House Digital); Be You (Juliana Kreipp for Design House Digital); Shine (Karen Funk for Design House Digital) corrugated cardboard; chipboard
Ink: Memento; Copics; Distress Ink; white gel pen
Dies: Labels Eighteen, Labels Three, Labels Small, Bird Flourishes, Floral Ovals (Spellbinders)
Accessories: Arch Lattice edge punch (Martha Stewart); organza ribbon; acrylic paint; Glossy Accents; button; eyelets; brads; sewing thread
Size: 6" x 5"
Thanks for visiting my blog!
To have Ink Up delivered to your inbox,
subscribe in the box at the top right of the page.

Tuesday Morning Sketch Challenge #145: Unlock Your Future

Tuesday, May 8, 2012

Happy Tuesday, Friends! It's Tuesday Morning Sketch Challenge time, again! This week is our judged challenge with a twist: use die cut(s).  Stamping Scrapping is our generous sponsor, and our own Kathy Curry has come up with a fantastic sketch for this challenge.

I'm using the CR84FN53 color palette of pink, aqua, and neutral:


My niece is graduating from high school this month, and I wanted to make her a card, but I wanted it to be something soft and feminine, rather than academically-themed. 
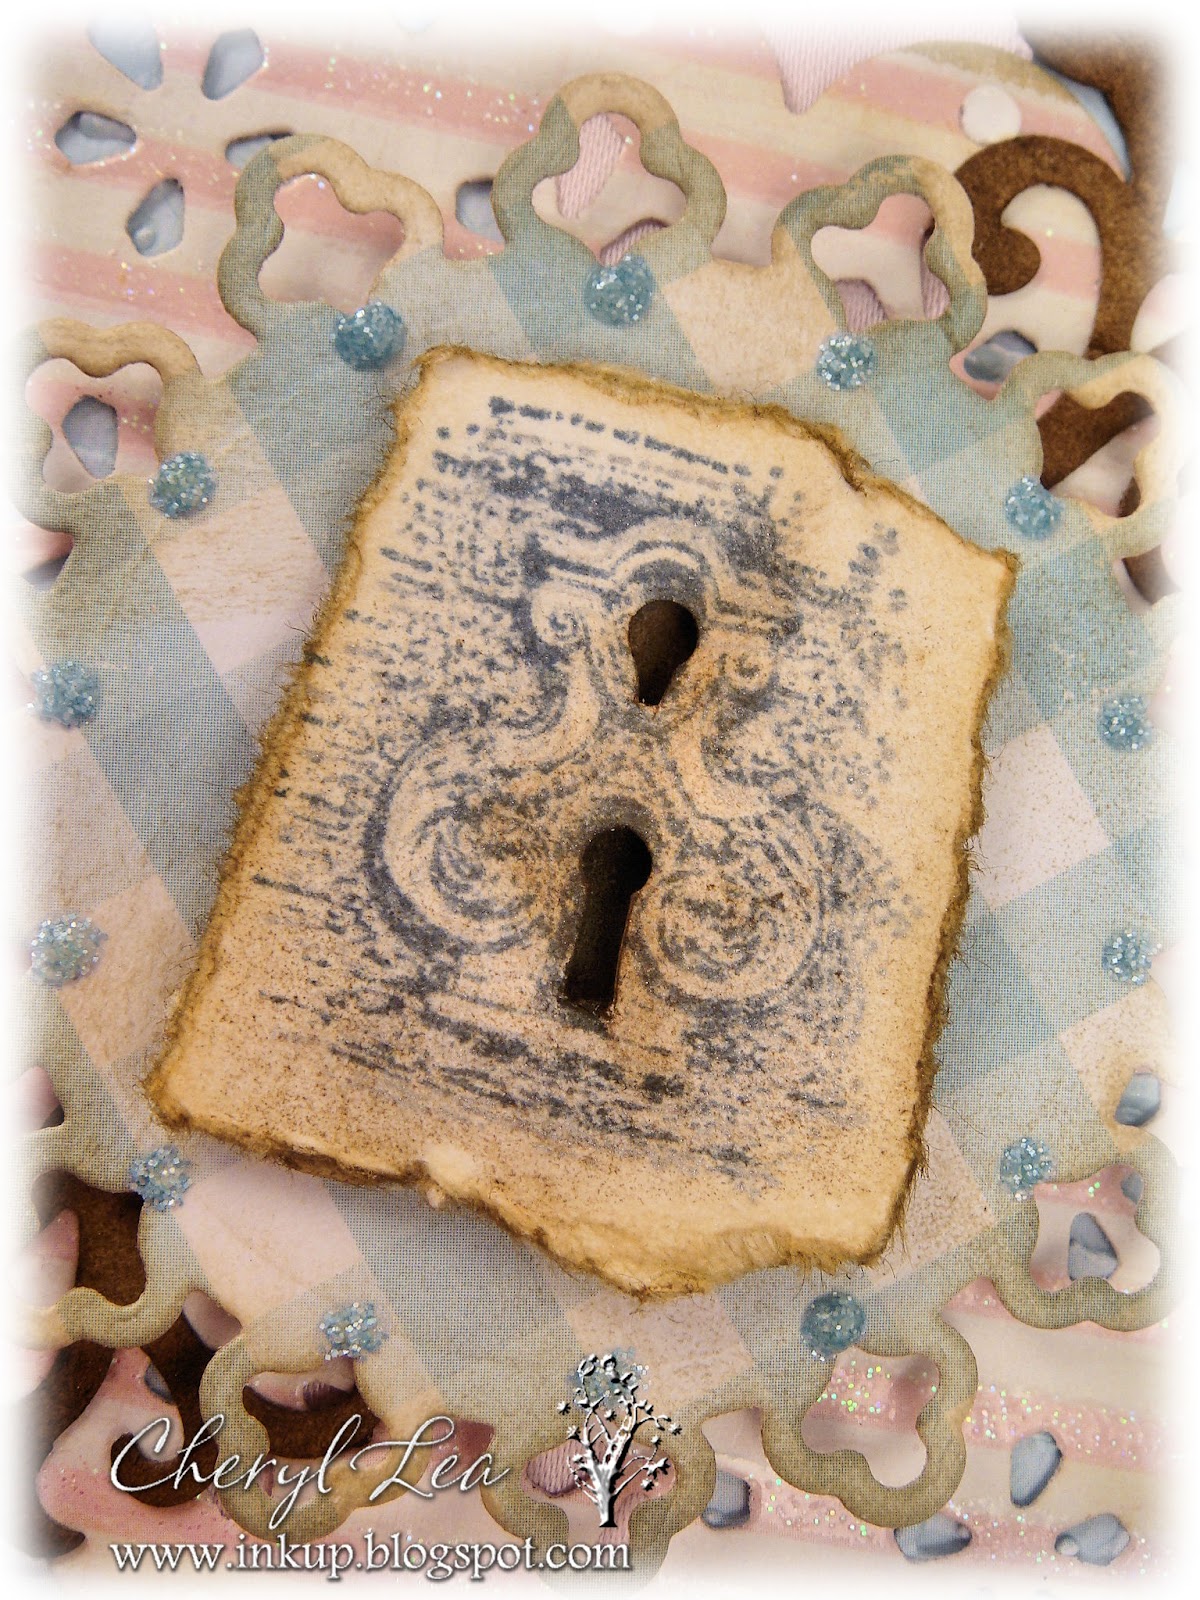
I turned the sketch sideways, and made it rectangular rather than square. Then, I layered several different die cuts, sponging Distress Ink on the edges for a vintage look, and topped it off with a lock stamp from Our Craft Lounge. I used a deckle ruler to tear the edges of the stamped layer, cut the lock openings with a craft knife, then further distressed it with ink. I used a brick design embossing folder for the bg paper, which I sewed along the edges before adhering to the card base.

Here's a peek at the inside:

The "unlock" sentiment is one I created in Word, printed onto a transparency, then rubbed onto the cs. I used three different Our Craft Lounge stamp sets for the key, flourish, and congrats sentiment (they're listed below). 

Okay! Ready to play? Well, head on over to the Tuesday Morning Sketches blog, where you'll find all the rules, the linking tool, and lots of fab inspiration by the rest of the DT! Then get all creative with your own project--remember this is our judged challenge! I can't wait to see what you create!

I'll be entering this card in these challenges:
CR84FN Color Challenge 53: Pink, Aqua, Neutral
Great Impressions Rubber Stamps Challenge #3: Anything Goes
The Emerald Fairies Challenge #23: Anything Goes


~Hugs,
 
Stamps: Under Lock & Key, Say It Big, In Flight (Our Craft Lounge)
Paper: Cafe Mediterranean (DCWV); Love Next (My Mind's Eye); Just Chillin' (Making Memories); kraft cs
Ink: Distress Ink; Memento
Dies: Fair Isle Pendant, Ironwork Accents, Bird Flourishes (Spellbinders)
Accessories: Scallop Dot Edge Punch (Martha Stewart); Bricked embossing folder (Sizzix); ribbon (Michaels); Stickles; Enamel Accents; sewing thread; foam dots
Size: A2 (4.25" x 5.5")
Thanks for visiting my blog!
To have Ink Up delivered to your inbox,
subscribe in the box at the top right of the page.

Sweet Baby

Monday, April 23, 2012

For my Week 4 Our Craft Lounge April Artist of the Month post, click here.

Hi Friends! Hope you're having a great start for the week. The card I'm sharing with you today is a baby shower card. Four of my nieces are having babies before the end of the year, so I figured I better get busy making cards for them.
I don't know if the babies will be boys or girls, but I figured, out of four, at least one should be a girl, so I made this card pink.


I used the Viva la Verve April 2012 Week 4 sketch. Instead of the arrow shape, I went with scalloped ovals that look a bit like clouds.

I used Glossy Accents on the moon and Stickles on the stars.

Here's a look at the inside.


I'm going to try to make my posts a little shorter, so I won't go into how I made this card, but if you have any questions, please send me an email or post a comment and I'll get back to you quickly. Also, you will find links to some of the products I used at the end of this post.

I'll be entering this card in the following challenges:
Viva la Verve April 2012 Week 4
Color Throwdown #188
Crafty Friends Challenge #2: Use Two Die Cuts
Little Darlings Challenge #21: Pastels
Whimsy Stamps Challenge #35: Punches or Die Cuts

Thanks for stopping by, and have a wonderful week!

~Hugs,
 
Stamps: Moon Baby digital stamp (Pink Gem Designs); Tiny Flowers & Tags (Flourishes); Summer Afternoon (Taylored Expressions); Blessings (Michaels)
Paper: Splendid (Authentique); Vellum
Ink: Copic markers; Distress Ink; Memento
Dies: Blossom Nestie; Big Scalloped Ovals Sm (Spellbinders)
Accessories: Scallop Diamond Edge Punch (EK Success); ribbon; rhinestones; Stickles; Glossy Accents
Size: A2 (4.25" x 5.5")
Thanks for visiting my blog!
To have Ink Up delivered to your inbox,
subscribe in the box at the top right of the page.