Showing posts with label Robyn's Fetish. Show all posts

Paper Sweeties October 2015 Inspiration Challenge

Thursday, October 1, 2015

It's Inspiration Challenge time at Paper Sweeties, and I love the color palette for this one. Being October, there are always so many orange/green/purple/black challenges out there, but Debbie has given us a more subdued palette to work with, and I just loved using it to create a cute monochromatic Halloween card.
This was a super simple card to put together, but the stamping and masking for the Halloween scene took a bit of effort. And, it was totally worth it! To create this scene, I first stamped all the images I wanted to use (from 4 different sets, all listed in my card recipe at the end of the post) onto a piece of scrap copy paper, and fussy cut each one of them. Then, I mapped out the scene to determine how to layer the masks. When you have layered images, especially this many images, you have to keep perspective in mind, and the images have to be stamped and masked in order from the "closest" image all the way to the last image in the background. For example, this scene required that I stamp the images in this order: hat, puppy, pumpkin, dog bowl and bones, dog house, broom, weather vane, ground, and tree. After each stamp, I put repositionable tape on the back of it's mask and masked the image. It can get a little tricky once you have several masks because all the images are fully stamped, so the masks start looking like a jumbled mess, but when you are finished and remove all the masks, and the final complete scene is revealed, it is fascinating to see! 

I colored the image with Copics in several shades of brown and gray, then added white highlights with a paint pen. You might notice a lot of highlights on the dog bowl. My pen blobbed and, since I can't remove white paint from a colored image without totally messing it up, I tried to correct it by incorporating it into the scene. Not a great job there, but I can live with it. ;) I added a few Paper Sweeties Gold flower sequins for shine and filled them with a black Pearl Pen dot.
On the inside of the card, I used scraps from the black flag that is on the front for a couple of small flags, as well as the same embossed design for the background. The punny sentiment and broom are both from the Best Witches stamp set.

I hope you'll join us in this month's challenge! There is a Paper Sweeties' Boutique Gift Certificate up for grabs!!!


Before you get crafty, be sure to check out the rest of the Paper Sweeties' DT blogs, as well as the talented Lisa Bzibziak, our October Guest Designer. Their creations this month are UH-MA-ZING!!!

Cheryl Lea - That's Me!
Debbie Marcinkiewicz – Paper Sweeties
Nancy Penir
October Guest Designer:  Lisa Bzibziak

Thanks for stopping by!

I'm entering this card in the following challenges:
~Hugs,

Supplies Used:

Thanks for visiting my blog!
To have Ink Up delivered to your inbox,
subscribe in the box at the top right of the page.

Coffee Tag

Friday, June 12, 2015

Hi there! I'm down to the wire with this coffee tag for the Summer Coffee Lovers Blog Hop.
I used several discontinued stamps for the beans, text, and stains; the bag of coffee beans and mug images are both from Tim Holtz. 

I'm entering this card in the following challenges:

~Hugs,

Thanks for visiting my blog!
To have Ink Up delivered to your inbox,
subscribe in the box at the top right of the page.

The Wonderful World of Boxes

Tuesday, May 5, 2015

I love making boxes and books! It's so satisfying to be able to design something from scratch, build it, and have a finished product that is well-made, sturdy, and attractive. And, it sure is nice to be able to decorate a box without once having to consider how heavy or thick an embellishment is!
I made this box to hold a card set that I made last year. I did make a box for the set when I first made the cards, however, it wasn't really deep enough, and envelopes wouldn't fit inside with the cards--not very convenient for a card set! This time, I get the measurements perfect. 

I used the May 2015 Week 1 Viva la Verve sketch to decorate the top of my box. The sentiment is stamped onto a piece of canvas that was left over from the box spine fabric, and it is distressed with distress ink, stamps, and a little water. I also stamped a few distressed spots in Pumice Stone Distress Ink in several places.
A side view.


I made this clay embellishment a couple of years ago. It started off as white, but I colored it with Inka Gold. I started with a base of Champagne Inka Gold, then to get the green into the crevasses, I added a tiny bit of water to some Green-Yellow Inka Gold and painted with it. The Copper was rubbed on dry. 
The spine of the box has a strip of the same cardstock that covers the top and bottom of the box.


This is the inside of the box. 
I added glass marble feet to the bottom of the box, then because these are a little slippery on furniture, I used a standard hole punch to punch small circles of craft foam, then glued them to the glass marbles. The foam dots also help with uneven marbles--no more wobbly boxes!

That's all for now. Have a Wonderful Week!

I'm entering this card in the following challenges:
Viva la Verve May 2015 Sketch Challenge: Week 1
Simon Says Wednesday Challenge: Anything Goes
613 Avenue Create Challenge #122: Anything Goes w/Optional Feminine
Robyn's Fetish Challenge #262: Anything but a Card
TCP Tuesday #289 Inspiration Challenge
Paper Issues: Chalk One Up With Your Own Style

~Hugs,

Supplies Used:

Thanks for visiting my blog!
To have Ink Up delivered to your inbox,
subscribe in the box at the top right of the page.

Paper Sweeties April Inspiration Challenge #30 - 'Hoppy Easter'

Wednesday, April 1, 2015

I don't know about you, but lately I had been feeling like winter would never end. Now, here it is, Spring--almost Easter! How does that happen? I hope it's not an April Fool's joke! ;)

Well, it's no joke that it's time for the Paper Sweeties April Inspiration Challenge: Hoppy Easter! And, I had a blast making this card.
If you are familiar with Paper Sweeties images, you already noticed that Abigail's eyes look different. As with a card I posted yesterday, I was inspired to try my hand at adding eye detail by Jane at Jane's Box of Colours. My detail is nothing like hers, but it's a start. ;) I also added folds to Abigail's paper pieced dress, from the Jelly Bean Time stamp set, using Copics, and gave her a satin sash with a gold Spica pen.

I used the Viva la Verve March 2015 Week 3 sketch for the card design, but instead of using a skinny fishtail banner under the bow, I cut a fishtail window to make a shaker. I have only made one other shaker card, but I just love Paper Sweeties sequins (Jellybeans is my favorite!), and the best way to be able to use lots of them is in a shaker. My Teamies often make beautiful shaker cards, like here, here, here, here, and here.
On the inside, I sponged Distress Ink around the edges of a piece of green cardstock, then masked off the center and stamped a spatter design in white pigment ink, stitched three banners to the top, then stamped a sentiment and cute little flower from the Bloom & Grow set.


I hope you'll join us in this month's Paper Sweeties Inspiration Challenge! Just check out the amazing creations my Teamies have to share with you. They are sure to spark your creative mojo!


Thanks for stopping by, and have a Sweet Week!

I'm entering this card in the following challenges:
Viva la Verve March 2015 Week 3 Sketch Challenge
Simon Says Stamp Monday Challenge: Pastels
Simon Says Stamp Wednesday: Anything Goes
613 Avenue Create #117: True Anything Goes...No Twist!
Sugar Pea Designs Challenge SPD14: Celebrate Spring
Corrosive Challenge #221: Hop Into Spring
ColourQ Challenge: CQC285
Cupcake Inspirations Challenge 303
Paper Issues: Eggs-Cellent Add-Ventures with 17Turtles
Robyn's Fetish Challenge #257: Easter Cards
TCP Tuesday #287: Anything Goes
The Paper Players Challenge #238: Claire's TicTacToe Challenge: Die Cut/Sequins/Blue

~Hugs,

Supplies Used:

Thanks for visiting my blog!
To have Ink Up delivered to your inbox,
subscribe in the box at the top right of the page.

Clip Heart

Thursday, February 12, 2015

This was a fun card to make, and super simple, too! Who knew basic office supplies could look so pretty, right? 
To make the main portion of this card I used a handful of round paper clips and two jumbo paper clips. (I actually still call the double oval clips, "Gem clips," but usually no one knows what I'm talking about. What do you call them?) After making two heart shaped clips from a jumbo paper clip, I cut the excess wire off one heart for embossing, then laid out the round paperclips and the modified heart shaped clip on a die cutting plate, placed a piece of white cardstock over them, then topped that with an embossing pad and another cutting plate, and ran it through my Big Shot. I colored the paper by sponging several colors of Distress ink over the embossed areas, blending the colors in between. After die cutting the paper with a distressed edge die, I sponged more ink along the edges, then distressed further by spritzing water onto the paper. Finally, I sprinkled some chunky white embossing powder onto the paper and heated it from the back side (to keep from blowing the powder off before it had a chance to melt and stick to the paper). After assembling the card front, I attached the 2nd heart clip to the top of the card.
To tie in with the front of the card, I embossed just the modified heart clip in the corner of a white die cut, then sponged Distress ink over that, and also over the entire die cut, while it was still in the die.

See? Easy peasy! Have a great day!

I'm entering this card in the following challenges:
Simon Says Stamp Monday Challenge: Red + Pink
Oddball Art Stamp: Add Some Sparkle Challenge
Robyn's Fetish Challenge #250: Valentine Cards
TCP Tuesday Challenge 283: Anything Goes

~Hugs,

Supplies Used:

Thanks for visiting my blog!
To have Ink Up delivered to your inbox,
subscribe in the box at the top right of the page.

Sweet Valentine

Sunday, February 8, 2015

Valentine's Day is right around the corner, so I used a stamp I've had for awhile to make a card for my daughter.

The image is colored with Copics and I used a white gel pen to add highlights to the cherries/hearts. I used this week's Mojo Monday sketch for the card design, substituting the flourish die cut for one of the fishtail banners. The flourish is covered with Diamond Stickles, but it's hard to see here. It's more visible in the banner at the top of the post. The "dots" are enamel dots, rhinestones, and melted beads. On the distressed rectangle die cut, I sponged Picked Raspberry ink around the edges and stamped a news print stamp in Dried Marigold ink while it was still in the die.
The inside of the card uses a similar distressed rectangle, with the sentiment and conversation hearts stamps coming from an old Hero Arts stamp set.

Thanks for stopping by, and have a wonderful week!

I'm entering this card in the following challenges:
Mojo Monday Sketch Challenge #383
Simon Says Monday Challenge: H is for....
Simon Says Wednesday Challenge: All Things Bright and Beautiful
613 Avenue Create Challenge #110: Anything Goes w/Optional Twist Color Bingo (pink/purple/blue)
Chocolate, Coffee & Cards Challenge #84: Love is in the Air
Fresh Brewed Designs: Feb 4-10 Challenge--Pink, Hearts, or a Valentine
Paper Issues: The Perfect Pairing
Robyn's Fetish Challenge #250: Valentine Cards

~Hugs,

Supplies Used:

Thanks for visiting my blog!
To have Ink Up delivered to your inbox,
subscribe in the box at the top right of the page.

Home Sweet Home & a DT Call!

Monday, February 2, 2015

Have you heard...Paper Sweeties is having a DT call! You have until February 21 to apply. I bought a Paper Sweeties stamp set at a stamp convention this past weekend, and I'm throwing my hat in the ring with this card...
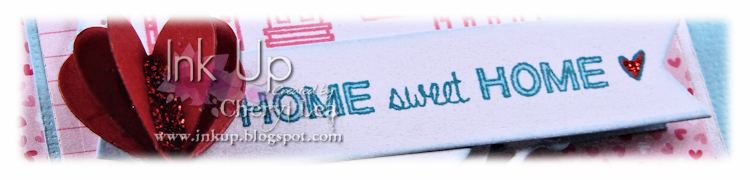
I used stamps from the Home Sweet Home stamp set and chose my colors from the February Paper Sweeties Inspiration Challenge. The card design is from this week's MFT Wednesday Sketch Challenge. For the 3-D heart, I die-cut three red cardstock hearts, stitched them through the center, folded the layers up, and added red Stickles to the center. I put a tiny bit of 3-D glue between the layers to make sure they stayed where I wanted them. It won't lie flat for mailing, but I'd rather have it fixed so the recipient sees it the way I envision it.


papersweeties-inspiration#28

I scored lines in the blue cardstock to mimic the beadboard lines in the inspiration photo, but it is hard to see them in the photo of my card. The dots in the lower right corner are all different. The white dot is an enamel dot from Michael's bargain bin, the blue dot is a Glass Effects Gel pen, and the pink dot is an "enamel" dot I made from melting a mini pony bead. It's the first time I've made them, and they turned out great, but holy moly do they smell bad! I won't be making any more of those until it warms up enough to take the toaster oven outside!
On the inside I used a Blueprints die set for the angled personalization panel, and also for the red heart. I'm leaving the inside blank, as this card could be used for any number of occasions.

Now, hurry on over and check out that Paper Sweeties DT Call

Stay warm, wherever you are, and have a sweet week!

I'm entering this card in the following challenges:
Paper Sweeties Inspiration Challenge #28: Sweetheart
The Shabby Tea Room Week #245: I {heart} You
My Favorite Things Weds Sketch Challenge #213
Simon Says Stamp Monday: H is for...
613 Avenue Create Challenge #109: Anything Goes
Really Reasonable Ribbon Challenge #110: Hearts and Ribbon Theme
Paper Issues: The Perfect Pairing with Epiphany Crafts
Robyn's Fetish Challenge #249: Anything Goes

~Hugs,

Supplies Used:

Thanks for visiting my blog!
To have Ink Up delivered to your inbox,
subscribe in the box at the top right of the page.
One Sheet Wonder Boxed Card Set with Wisdom

Sunday, December 28, 2014

I hope y'all had a wonderful holiday, and are, perhaps, still enjoying it. In the words of the world's most famous fictional trespasser, Christmas at our house wasn't too crazy, it wasn't too tame...it was "just right." Well, all except for the flu bug we've had for over a week! But, that's almost run it's course, too, so all is well.
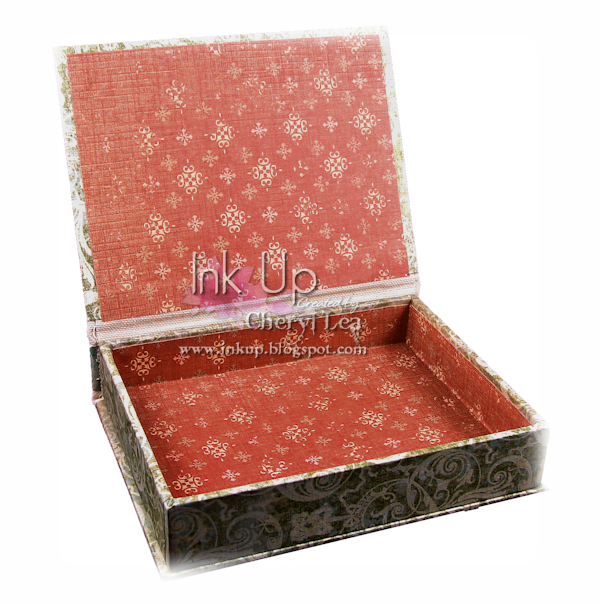
A couple of posts ago, I made a set of cards for a One Sheet Wonder Challenge at Viva la Verve, and I decided to give it another go, this time making a hinged lid box for the set, too. You can see the spine of the box here.

I used mat board to construct the box, and I wanted it to be really sturdy, so I glued 2 boards together to get a nice thickness. The box is actually large enough to hold the envelopes, too, but I forgot to put them in for the photo.
I've always loved making and decorating boxes, and have made lots of different ones, usually out of heavy cardstock or chipboard. And, having a Silhouette has certainly made boxmaking much easier, but I see more boxes like this one in my future. Between the gorgeous, heavy papers and the super thick boards, this box has a nice, substantial look and feel to it that I like, and it's definitely worthy of gifting! Now here's a look at the cards that are inside:
The Words of Wisdom stamp set from Verve is one of my all-time favorite sentiment sets. The sentiments are encouraging, and appropriate in so many instances, and the bold and varied fonts are just plain fun! I stamped those in Memento Tuxedo Black ink. I colored the Crackle embossed layer and the sentiment circle with copper and turquoise Inka gold and edged them with Black Soot Distress Ink. For just a little more texture, I added one line of stitching to each sentiment, leaving threads dangling, and also stitched on one other piece on each card. The colored dots were mini pony beads in another life. For Christmas, my daughter gave me a toaster oven for my craft room so I can make embellies without having to heat up the big oven upstairs. It works great except for the stench from the melting plastic! I may carry the oven to the back porch before I try that again! (The 6x6 paper I used is from the My Mind's Eye Reunion pad).
The inside of the cards are all similar. I used a white, tilted personalization layer with distressed edges, added two 1" circle punches from an extra sheet of the cardstock (remember, I used the entire 6x6 sheet for the front of the cards, so there wasn't any waste there), and used opaque Souffle pens to do just enough doodling to brighten everything up.

And, that's all for now! Thanks for visiting, and have an awesome week!

I'm entering this card in the following challenges:
Viva la Verve December 2014 OSW Challenge
Simon Says Stamp Wednesday Challenge: Anything Goes
613 Avenue Create Challenge #104: Anything Goes
Sugar Pea Designs SPD12: Anything Goes
Robyn's Fetish Challenge #244: Anything Goes
TSC Challenge #61: Anything Goes

~Hugs,

Supplies Used:

Thanks for visiting my blog!
To have Ink Up delivered to your inbox,
subscribe in the box at the top right of the page.

Warm Cocoa Wishes

Friday, December 19, 2014

This past week, my daughter and I have both been feeling puny, and warm cups of hot chocolate were very welcomed by us! So for my Tiddly Inks Fabby Friday post, I decided to use the adorable Cocoa Wishes image and girly colors for a fun seasonal card. 
I colored little Wryn up with copics, fussy cut her, then popped her up with some foam tape. The card design is from this week's Your Next Stamp Sketch & Color Challenge. I cut the text out of heavy glitter paper.

Sadly, my time is up on the Tiddly Inks DT, so this will be my last post for them. There should be another DT call soon, for the next season, so be on the lookout. I highly recommend this DT for anyone interested in DT assignments. Christy, and the entire team, is amazing, and I enjoyed every minute I was there.

Be sure to stop by Tiddly Inks and see what the rest of the DT has for today's post. As usual, their creativity and talent will blow you away!

Thanks for stopping by, and have a wonderful weekend!

I'm entering this card in the following challenges:
YNS Sketch & Color Challenge #4
Simon Says Monday: Anything Goes
Simon Says Wednesday: Winter Inspiration
613 Avenue Create #102: Anything Goes
Sugar Pea Designs SPD12: Anything Goes
Chocolate, Coffee, & Card Challenge #80: Christmas
Corrosive Challenge #214: Anything Goes
Robyn's Fetish Challenge #242: Winter Cards with Glitter
The Shabby Tea Room Week #242: Shabby Chic Holiday
TSC Challenge #60: Anything Goes

~Hugs,

Supplies Used:

Thanks for visiting my blog!
To have Ink Up delivered to your inbox,
subscribe in the box at the top right of the page.

One Sheet Wonder Christmas Card Set

Thursday, December 18, 2014

My favorite way to start a card is with a sketch, and Viva la Verve has a sketch challenge for December that I couldn't pass up--a One Sheet Wonder Challenge.


I had never even heard of something like this before, so I was interested in seeing if I could do it. I decided to go for a vintage look using some Tim Holtz Blueprints stamps, colored very roughly with Copics. My supply list is at the end of the post.


I didn't take a photo of the inside, but each card is stamped with the same Christmas sentiment.

This was definitely a challenge for me, and it was pretty cool to use every single inch of a 6x6 piece of paper, but I think I prefer winging it when I make cards, even if it means there is a little waste involved. ;~)

Thanks for stopping by, and have yourself One Wonder-ful weekend!

I'm entering these cards in the following challenges:
Viva la Verve December 2014 Sketch Challenge
Simon Says Monday: Anything Goes
Simon Says Wednesday: Winter Inspiration
613 Avenue Create #102: Anything Goes
Sugar Pea Designs SPD12: Anything Goes
Chocolate, Coffee, & Card Challenge #80: Christmas
Corrosive Challenge #214: Anything Goes
Robyn's Fetish Challenge #242: Winter Cards with Glitter

~Hugs,

Supplies Used:

Thanks for visiting my blog!
To have Ink Up delivered to your inbox,
subscribe in the box at the top right of the page.

Winter Blues Tiddly Inks Challenge

Tuesday, December 9, 2014


Got the winter blues? Well, why not channel that into a fun challenge--Tiddly Inks Happy Winter Blues Challenge!  
The Faythe Gives image I used on this card was so much fun to color with my Copics. I loved adding all the lumps in her sack and the folds and gathers in her dress and hat, and it's always challenging, in a good way, of course, to use non-traditional colors at Christmastime. Can you see the 3-D fur on her hat and dress? I used my Snow Marker there. That stuff is fantastic!
The inside of the card has a simple sentiment and several circular layers. I like to have sparkle somewhere on my cards when I can work it in, so I added Diamond Stickles to the white snowflake layer, and colored the little ornament stamp with silver and gold Wink of Stella markers.

Make sure you check out the rest of the DT's happy work, then grab something blue and link up your own creation to the Winter Blues challenge! This is the last Tiddly Inks challenge of 2014, so if you miss it, you'll have to wait until January for the next one! ;)

Thanks for stopping by, and have a Happy Winter day!

I'm entering this card in the following challenges:
Deconstructed Sketch No. 178
Simon Says Wednesday Challenge: Christmas/Holidays
613 Avenue Create Challenge #101: Anything Goes
Sugar Pea Designs Challenge SPD11: Winter Wishes
Corrosive Challenge #214: Anything Goes
Robyn's Fetish Challenge #241: Christmas Cards
Fresh Brewed December Challenge: Christmas Anything Goes

~Hugs,

Supplies Used:

Thanks for visiting my blog!
To have Ink Up delivered to your inbox,
subscribe in the box at the top right of the page.