Showing posts with label Cute Card Thursday. Show all posts

Once You Learn To Read

Friday, August 24, 2012

Hi Friends! Happy, Happy Friday!!! I am SO glad the weekend is finally here. Who knew 3rd grade could be so stressful? Wish a cute little bookmark, made with lots of love, could make it all better.

The bookmark is cut from kraft cs, and the colors came from the TCPTues 223 Color Challenge.

I'd like to enter this project in the following challenges:
Simon Says Stamp: Back to School
TCPTues223 Color Challenge: Rose, Sunshine, Teal
Cute Card Thursday Challenge #231: Bling It Up
A Blog Named Hero Challenge #10: The Krafty Crafter

Thanks for stopping by and have a great weekend!

~Hugs,

 
Stamps: Mark Your Spot (Taylored Expressions)
Paper: Kraft; Hello Spring (Little Yellow Bicycle)
Ink: Colorbox; Distress Ink
Dies: Mark Your Spot Bookmark (Taylored Expressions); Romantic Rectangles, Antique Frame & Accents, Rose Creations (Spellbinders)
Accessories: Twine; brad; Corner Chomper; felt; Memory Thread (DMC); Stickles; Prismacolor pencils; acrylic paint
Size: 1.75" x 6.25"
Thanks for visiting my blog!
To have Ink Up delivered to your inbox,
subscribe in the box at the top right of the page.

Thinking of You with a Tag

Monday, August 13, 2012

Hi Friends! I'll only be a second! Here's a card I made for a few challenges.

As it's a "thinking of you" card, I wanted it to look a little bit doodled on, so I stamped a lot of random stamps on the blue text cs, and added lots of Pearl Pen dots on the flags. I turned the partial circle layer into a tag. I layered two different digi papers to create the purple paper for the flags.


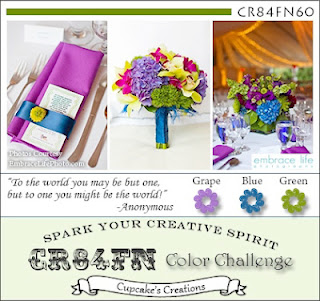
I turned the Viva la Verve sketch upside down, and used the CR84FN60 color challenge for my palette, even though I'm not entering that particular challenge since I'm entering more than two other challenges. :(

Here's a shot of the tag partially out of the pocket. To keep the tag from sliding behind the "thinking of you" sentiment layer, I glued down the entire left side of the upper panel, and only glued the right and bottom edges of the right side. To keep the tag from catching on the twine that is wrapped around the layer, I glued a strip of kraft cs over the twine on the backside.


And, this is what the entire tag looks like. The leaves stamp on the tag looks smeared on purpose. I stamped it twice. The first time I spritzed water on my stamp after inking it up. Then I re-stamped it without water to give it more definition. I colored the "O" of the tag sentiment with a Copic marker.

Thanks for stopping by, and have a wonderful week!

I'd like to enter this card in the following challenges:
Cute Card Thursday Challenge #229: Tag You're It!

~Hugs,

 
Stamps: Tag Time, Kind Words, Bloom & Grow (Verve); Under Lock & Key, Vintage Traveler (Our Craft Lounge); Summer Afternoon, Vintage Dreamer (Taylored Expressions); Avignon (7 Gypsies)
Paper: Breeze (My Mind's Eye); Reflections (Prima); kraft; Kim's Scrappin' Color Purple digi paper; Grungy Tile digi paper (Lost & Taken) 
Ink: Distress Ink; Memento; Colorbox; Copic markers
Dies: Nested Lacey Pennants, Ribbon Tag Trio Two (Spellbinders); Brackets (Tim Holtz-Sizzix); Tagged Rectangle, Elegant Leaves (Verve)
Accessories: Woodgrain embossing folder (Sizzix); ribbon (Offray); twine; pearls; mini round gems; eyelet; buttons; Liquid Pearls; Pearl Pen; corner chomper; sewing thread; foam dots
Size: A2 (5.5" x 4.25")
Thanks for visiting my blog!
To have Ink Up delivered to your inbox,
subscribe in the box at the top right of the page.

All Things Grow With Love

Thursday, August 2, 2012


I'm back! I'm really cutting it close to get all these cards made in time for the Viva la Verve challenge deadline! ;)

For my Viva la Verve Week 5 card, I turned the sketch sideways, used a rectangular die cut instead of an oval, placed it a little off-center, and added a few embellishments.


The Verve Week 5 sketch is really simple, so I chose a pretty dp that might normally be hidden in a busier sketch.

I just love the butterfly graphic. (I did add some Stickles to it's wings, though. :) And, the Colour Q color challenge this week is a beautiful palette.

I used vellum for the long rectangle at the top of my card. I tried just stamping the images with clear embossing ink, but it kept smearing (I ended up starting over three times!). Finally, I used a red Distress Ink then added clear embossing powder over it. I love the final result. I used black Enamel Accents for the butterfly bodies.


The flower stamp on the inside matches the one on the sentiment panel on the front.

And, that's all I have for tonight! I finally got around to cleaning and organizing my craft room. In the next day or two, I'll post before and after photos!

Thanks for stopping by...again!

I'd like to enter this card in the following challenges:
Viva la Verve Sketch Challenge VLVJul12 (Week 5)
Colour Q Challenge #148
Cupcake Craftroom August Challenge: Fresh & Summery
A Blog Named Hero Challenge #9: Freestyle

~Hugs,
 
Stamps: Bloom & Grow, Kind Words, Blue Skies (Verve)
Paper: Mariposa Mat Stack (DCWV); vellum
Ink: Memento; Distress Ink
Dies: Antique Frame & Accents (Spellbinders); Elegant Leaves die (Verve)
Accessories: Classic Butterfly punch (Martha Stewart); corner chomper; flower; Stickles; Enamel Accents; clear embossing powder; Distrezz-It-All
Size: A2 (5.5" x 4.25")
Thanks for visiting my blog!
To have Ink Up delivered to your inbox,
subscribe in the box at the top right of the page.

Faith, Trust, & Pixie Dust

Monday, July 23, 2012

Happy Monday, Friends! I hope your week is getting off to a great start. I'm starting off the week in my craft room, so I'm a happy girl, today! One of my nieces is having a baby girl soon, and I found out that she is decorating the nursery in a Tinkerbell theme, using pinks and purples. I just happened to have a cute Tink digi image, so I went to work, to make a nursery wall hanging that would double as my baby shower card.


This project took me longer than anything I've ever worked on, but I think all my time was worth it. That said, this is a fairly long post, and very photo heavy. :)


Both The Shabby Tea Room and Stampin' For the Weekend had spectacular photos for inspiration. I just love all the girliness in them. 


I decided right away that I was going to use Prima's Fairy Flora paper pack and a Vintage Damask digi paper, so that part was easy. But, finding a sketch wasn't, because I wanted to use several different papers and didn't want to cover them up too much.   I tried several sketches, and this one, from the Simon Says Stamp Challenge this week was perfect!


My sewing machine has a lot of built-in stitches that I've never used, so I thought I'd try one out here. Being a fairy project, a leaf stitch seemed like a good choice. I used a meandering stitch on the bg paper, and alternated between zig zag and straight stitch on the vertical panel.


While I had my sewing machine going, I took some wide lime green tulle ribbon, folded about a third of it over, then stitched down the center to make a ruffle for the bottom of the wall hanging. I adhered the mini pompom trim and the tulle ruffle with Scor-Tape.


Every little girl needs lots of sparkle in her bedroom, so I used Stickles on Tink's wings, shoes, eyes, and the edges of the flowers. 

The white dots around the "Hello Baby" sentiment are Liquid Pearls. The yellow center on the pearl flowers are dots of yellow Liquid Pearls, too.


If you've read my blog very long, you know I love making my own rub-ons with transparencies. All the sentiments on the project, except for the Flourishes Hello Baby stamp, were made in Word, printed on transparencies, and rubbed onto the cs. I could just print directly onto the cs, but I prefer the look of rub-ons because it looks more like a stamp.


I like decorating the back of my wall hangings so they double as a card. For this one, I used the Vintage Damask digital dp again, in green and in violet. I paper pierced the edge of the die cut, stamped a Heidi Grace flower, added my rub on quote and sentiment, distressed the green dp, added another Heidi Grace corner stamp, inked the edges, then glued it all down. Oh, and I've learned to add the eyelets to the back layer of the wall hanging and to thread my ribbon through, before adhering the decorative front. It hangs much better that way, and I prefer not seeing the eyelets from the front most of the time.


The flourish stamp at the bottom of the project came from a Heidi Grace set that I won in a Color Throwdown Challenge/Blog Hop. Check out the blog candy I received from DT member, Wanda Cullen! Thanks, again, Wanda!


Here are a couple of photos of what I've been spending my time on lately: making doll clothes! My DD is thrilled with them, but, MAN, are they time consuming!


Thanks for stopping by and hanging with me until the end! ;) Have a wonderful week!

I'd like to enter my wall hanging card project in the following challenges:
Simon Says Stamp: Dawny's Sketch
Flourishes Bring Back Beautiful BBB24: The Beauty of Winged Things
The Shabby Tea Room Week #124: 'Oh-So Pretty in Pink'
Cute Card Thursday Challenge #226: Fairy Nice
Moving Along With the Times Challenge: We Are In the Pink (Pink, Pearly, and Pretty Celebration)
Whimsy Stamps Challenge #48: Punches and Edgers
Crazy 4 Challenges C4C146: Stitching--Faux or Real
Fat Pages & Cards With Attitude #18: Anything Goes
The Poodles Parlour: Use a Digi Stamp
Stampin' For the Weekend #14: Photo Inspiration
Digi Doodle Shop Challenge #117: Anything Goes
Sentimental Sundays #112: Things With Wings
Color Me Creative Challenge #48: Anything Goes With a Girly Twist
Totally Gorjuss Challenge #141: Leaf It In!

~Hugs!
 
Stamps: Little Honey's Tinkerbell (Sassy Studio Designs); Hello Baby (Flourishes); Wild Daisy Road (Heidi Grace)
Paper: Fairy Flora (Prima); Vintage Damask Digital Paper (Print Candee)
Ink: Copic markers; Distress Ink; Colorbox
Dies: Fancy Tags Two, Labels One, Floral Doily Accent, Labels 25, Classic Scalloped Circles Sm, Bird Flourishes (Spellbinders)
Accessories: Abstract Flower Edge Punch (EK Success); tulle ribbon; mini pompom trim; satin ribbon; rhinestones; pearls; eyelets; flowers; Stickles; Liquid Pearls; sewing thread; foam dots; Distrezz-It-All; some sentiments created in Word.
Size: 6-3/4" x 8"
Thanks for visiting my blog!
To have Ink Up delivered to your inbox,
subscribe in the box at the top right of the page.

Happy Bark-Day

Friday, May 18, 2012

Well, here I am again! This time I've got a more masculine kids birthday card.


I used the Viva la Verve May 2012 Week 3 sketch, and Kathy's Lily Pad Palette Challenge for color inspiration.
For the bg, I inked up the Bricked embossing folder before running it through my Big shot, then mixed copper and white acrylic paint to distress it a little bit.


I stamped the dog on a piece of patterned paper, colored a few spots with Copics, added a Pearl Pen nose and eyes, and used a white opaque pen for the circle around the eye, which I also covered with Glossy Accents. The hat was paper pieced and I added a little bit of Stickles to it. The brown layer behind the dp layers is a piece of cardboard. I distressed the edges with a Distrezzer and some Walnut Stain ink, then added some of the white and copper acrylic paint, and finally spritzed with Gold Perfect Pearls Mist. I know the sentiment, "Bark-Day," is a play on the dog, but I love that the cardboard ended up looking a little bit like bark, too.

I don't think you can tell in this picture, but Glossy Accents covers the balloon completely.

I'll be entering this card in the following challenges:


And, that's it for me today. Thanks for stopping by (again)! Hope you have a great weekend!

~Hugs,
 
Stamps: Birthday Buddies (Paper Smooches); Big Birthday Wishes (Our Craft Lounge)
Paper: Carolyn Gavin (K&Co); Story Teller (Crate Paper)
Ink: Memento; Distress Ink; Copic markers; white opaque pen
Dies: Rounded Rectangle (Verve); Standard Circle Lg (Spellbinders)
Accessories: Postage Stamp edge punch, Binding Edge punch (EK Success); Bricked embossing folder (Sizzix); Zing embossing powder; ribbon (Michaels); acrylic paint; cardboard; brads; Glossy Accents; Stickles; Pearl Pen; Perfect Pearls Mist; foam dots
Size: A2 (4.25" x 5.5")
Thanks for visiting my blog!
To have Ink Up delivered to your inbox,
subscribe in the box at the top right of the page.

Happy Bird-Day

Hello Friends! Well, today was the last day of school here, and my daughter is soooo happy! Truth be told, I'm pretty happy about that, too. It will be nice to just hang out around here with her, with no schedule to keep for awhile. I'm really lucky that my daughter is the type of kid who is fun to be around, so having her with me all day is a treat.

The card I want to share with you today is a birthday card for a child. Kids cards are not my forte, but I keep trying.

For this one, I used a new set of stamps that I recently won from Paper Smooches in a Simon Says Stamp challenge. I have wanted to try Paper Smooches stamps for awhile because the cards I've seen them on are always so cute, and with several kids parties coming up for us soon, I knew they would be perfect! Thanks, Kim! I love my new stamps!!!


For my inaugural Paper Smooches card, I decided to play along with the Paper Smooches Sparks Challenge (I flipped the horizontal image upside down), and I used the Color Throwdown #192 colors.


The sketch was perfect for a bird on a wire-type image. I added the pink pine needles simply because I just bought the punch and couldn't wait to use it for something. :)


Isn't that bird the cutest! I colored it with my Copics, then added Sparkly Fluff for texture. I first used a light pink Sparkly Fluff, but the glitter in it made the bird look a little dirty. So, I added the darker pink over that, and loved it. That's Stickles on the beak and hat, and the eyes are a little googly with Glossy Accents.

I used an Our Craft Lounge stamp for the inside sentiment and the Abstract Flower punch was another recent purchase I was itching to use. Before gluing the white layer to the pink layer, I masked all but the punched area and used distress inks to color the flowers, then after gluing it down, I added Stickles for more sparkle. 

I'll be entering this card in the following challenges:

Thanks for stopping by! I'll be back in a little while with a more masculine kid's birthday card.

~Hugs,
 
Stamps: Birthday Buddies (Paper Smooches); Big Birthday Wishes (Our Craft Lounge)
Ink: Memento; Distress Ink; Colorbox; Copic markers
Dies: Nested Lacey Pennants (Spellbinders)
Accessories: Designer Pine punch (McGill); Abstract Flower edge punch (EK Success); Polka Dots embossing folder (Cuttlebug); buttons; twine (The Twinery); Sparkly Fluff (Our Craft Lounge); Stickles; Glossy Accents; foam dots
Size: A2 (4.25" x 5.5")
Thanks for visiting my blog!
To have Ink Up delivered to your inbox,
subscribe in the box at the top right of the page.

Dream Big

Friday, March 30, 2012

Hi there, Friends! I've got to get two cards posted in the next few minutes to meet the deadline for the March Viva la Verve Sketch Challenge, so you get a break from my usual ramblings and multiple photos. Bare bones for me tonight.

Here's the Week 3 sketch for the Viva la Verve challenge:


And, here's my card:


I'll be entering this card in the following challenges:


Thanks for stopping by. I'll be back in a few minutes with another card! :)

~Hugs!
 
Stamps: Words of Wisdom (Verve)
Paper: Bright Blossom (SEI); Farmhouse (Crate Paper)
Ink: Distress Ink
Dies: Classy Label Die (Verve); Ironwork Accents (Spellbinders)
Accessories: Damask embossing folder (Sizzix); flower (Prima); glitter (Martha Stewart); brad; sewing thread
Size: A2 (4.25" x 5.5")
Thanks for visiting my blog!
To have Ink Up delivered to your inbox,
subscribe in the box at the top right of the page.