Timeless Tuesday #244: Mad for Plaid

Tuesday, October 29, 2013


Hello there, Blog Friends! What have you been up to lately? Me? I did more reorganization in my craft room. I recently began using Jennifer McGuire's stamp storage system, and I love it so much, I switched my dies over to the same system, and I wanted to share a couple of links with you, in case you are thinking of using her system, too. I found the clear dvd sleeves here, for just $4.99 for 50, and if you look at the top of my sidebar, I've put a link to a site that has the divided Fridge Binz containers for just $10.99 right now, which is almost half the retail cost! (It won't look exactly like the photo on the site, but it has the same dimensions.) And, if you use the code CLEA5617, you can get an additional 20% off your first order! 


Now, are you ready for this week's Timeless Tuesday Challenge? It's a simple, but fun one! The incredibly talented Katie, who is Mad for Plaid, is challenging us to:


I decided to go with both plaid and houndstooth on my card, today. :)
Using Memento Tuxedo Black Ink on Flourishes Classic White Cardstock, I stamped the gorgeous pine cone from the Naturally Merry stamp set to make this Christmas card, cutting the image with the coordinating Silhouette cut file, and coloring it with Copics. I added tiny little prickles to the ends of the scales with a white acrylic marker. The open circular die cut behind the image is a Spellbinders die cut that I painted with acrylic paint, and the bg, as you can see, is a small houndstooth pattern on top, and a plaid on the bottom, with a strip of washi tape in between. The sentiment, stamped with Memento Rich Cocoa Ink, is from the same stamp set. I got a little crazy with a Pearl Pen, adding quite a few random pearls on the houndstooth layer, but I really liked the snowy effect it created.
The sentiment on the inside of the card is from the Country Time Christmas stamp set, and I used the stars from the set to create white embossed "snowflakes." You can see them better in the photo below. I left the bottom of the inside unadorned so nothing would show through the border die cut on the front of the card.
I hope you'll play along this week! Just get yourself a piece of houndstooth or plaid cardstock (or both!), and get creative in any direction you choose. And, remember, you don't have to use Flourishes stamps, but if you do, you get have a better chance of winning! You can find all the details for the challenge here.

For some amazing inspiration, be sure to visit all our designers' blogs, and leave them a little blog love while you are there. :) And, sadly, this is Broni's last week on the team, as she is stepping down to ease her busy schedule a bit, so give her a big virtual hug when you stop by her place. We'll miss you, Broni!!!
Thanks for stopping by, and have a Merry & Bright week!

I'm entering this card in the following challenge:
Simon Says Stamp Monday Challenge: Anything Goes

~Hugs,
 
Supplies:


Thanks for visiting my blog!
To have Ink Up delivered to your inbox,
subscribe in the box at the top right of the page.

A Little Princess


I have a great niece who is having a tiara party for her first birthday in a few weeks, so I made her a sweet tiara birthday card. :~)
The image was colored with Copics and gussied up with Stickles. The border of the circle die cut was embossed with an Enhancing Elements Spellbinders die, painted with silver paint, and blinged out with more Stickles. The yellow layer is a Nestie die cut that I dry embossed, but before embossing it, I inked the embossing folder with Squeezed Lemonade Distress Ink to give it a letterpressed look. The white flowers came from the bargain bin at Michaels. I gave them a touch of pink with Spun Sugar Distress Ink and Diamond Stickles. I stamped the solid gray base with a rose image in white ink.

On the inside, I stamped the rose image again on the gray base, and before I cut the white personalization panel, I inked the die with yellow ink to give just the embossed edge of the die cut some color. The rose image on the panel is the same image I had stamped on the base. The sentiment is a freebie I got from Verve in my last order.

I'm entering this card in the following challenges:
Viva la Verve October 2013 Week 5 Sketch Challenge
Simon Says Stamp Monday Challenge: Anything Goes

Thanks for stopping by, and have a great week!

~Hugs,
 
Supplies:  
Thanks for visiting my blog!
To have Ink Up delivered to your inbox,
subscribe in the box at the top right of the page.

Friends Make Life Sweeter...and a Birthday Challenge!

Monday, October 28, 2013


IT'S A SURPRISE PARTY!!! Grab a handful of confetti, a bright balloon and come along for a fun birthday blog hop to celebrate a special birthday for our dear friend, Christine Okken!  One thing about birthdays, is that you always hope to spend time with those you care about and that's why we're here!  At Flourishes, we're just one big family... so we just wanted to celebrate a wonderful day with one of our loved ones.


Even though we're a day early, we'd like to say...

HAPPY BIRTHDAY CHRISTINE!

Join along with members of the Flourishes family today and share some fabulous birthday inspirations, many happy celebratory birthday wishes and maybe even a slice of cyber cake.


For Christine's birthday, I inked up sweet raspberries, from the Berry Sweet Frames stamp set, with Tuxedo Black Memento Ink, stamped them onto Flourishes Classic White Cardstock, and colored them with Copic markers (the Copic Sketch Collections I used are shown at the end of the post). Then, I masked the image and stamped the gingham background with Pear Tart Memento Ink. After cutting it out with a Flourishes' Perfectly Pierced Classic Frames Die, I kept it in the die and sponged Tea Dye Distress Ink just inside the edge for a slight aged look. The highlights on the berries were made with Copic Opaque White Pigment. The die cut matting behind the image is a Spellbinders Decorative Label 22 die. I didn't have quite the right shade of cs, so I found a dp that was close and sponged Picked Raspberry Distress Ink over the edges to get it just right. Finally, I layered a piece of stitched green dp, burlap ribbon, a seam binding bow, metal embellie, and a few pearls. The card front is on a base of Bouquet cardstock from the Color Made Easy Crocus Paper Collection.
On the inside, the "Happy Birthday" sentiment came from the Inside & Out Happy stamp set. The "Friend" text is from the same sentiment that I used on the front. I just masked off the rest of the sentiment before inking the stamp.

Happy Birthday, Christine!
May your special day be spectacularly sweet!

In honor of Christine's birthday celebration, we're giving away a special birthday present or two of our own!  Hidden among the Design Team's blogs today is a Mystery Blogger. Comment on her blog and you could be chosen as one of our birthday prize winners! The more you comment, the better your chances of winning.

As well as one lucky commenter, we're having a birthday challenge too!

THE OFFICIAL RULES:
  • Simply create a NEW birthday themed card or project.
  • Entries need to be in by Friday November 1st at 6 PM EST.
  • Those entries using Flourishes stamps will be counted for 2 prize ballots!
  • You must link your creation in our InLinkz Widgit to be counted.
  • You must have a link to our challenge in your blog post or gallery post.  Please feel free to use our Birthday Graphic too!
  • If you upload to SCS please use the keyword FLLCWISH
  • We'll announce the winners on the Flourishes blog on Saturday November 2nd, so check back then to find out if you are a winner!

Hop along with our Flourishes family today, and leave some love for our fabulous designers for a chance to win...

Aleksandra Mihelič
Allison Cope
Cheryl Lea
Deborah Anton
Dina Kowal
Heather Jensen
Jenny Gropp
Julie Koerber
Kathy Jones
Maki Jones
Meredith MacRitchie
Naomi Gong
Stacy Morgan
Silke Ledlow
Tosha Leyendekker

Don't forget to stop by Christine's blog, HERE, and send her some birthday wishes too!

~Hugs,
 
Supplies: 
Thanks for visiting my blog!
To have Ink Up delivered to your inbox,
subscribe in the box at the top right of the page.

Timeless Tuesday #243: Fussy Can Be Fun!

Tuesday, October 22, 2013


Do you have a favorite day of the week? Mine used to be Saturday (never Friday--it was a work day!). Now, however, it's...Tuesday! Well, here we are, and, Sur-prise, Sur-prise, Sur-prise!, it's time for another Timeless Tuesday over at Flourishes!!!


The uber-creative Jenny is our hostess this week, and being that she is always on the "cutting-edge" of papercrafting (sometimes I just crack myself up with my clever puns!), it's seems only fitting that she is challenging us to...


I was excited to see the challenge this week, because it gave me my first chance to use one of Flourishes Silhouette Cut Files on my brand new Silhouette! The main reason I even wanted a Silhouette was to be able to cut out Flourishes stamped images, and I have to say, it is SO worth it! I see many more fussy cut images in my future. ;)

Now, on to my card...
This late in October, it's definitely starting to feel like fall around here, but I had a more summery stamp set that hadn't seen ink yet, so with a friend's upcoming birthday in mind, I used the Picking Wildflowers stamp set for this week's Timeless Tuesday Challenge. With the Silhouette doing the fussy cutting, I cut my Classic White cs first, then stamped the image in the cut with Memento Tuxedo Black Ink. Will you just look at the detail in the fussy cutting around that beautiful image! What I really like is that it can also cut out interior sections of an image, which I would normally either have to just leave in or cut with a craft knife. The little butterfly on the left is a separate stamp in the set, and I used the Silhouette to cut it out, too! The images are colored with Copics, and you can't see it in the photo, but I added some shine to the butterfly wings with a clear Spica pen. The white dots on the flower stamens were made with a white acrylic paint marker. The main image is popped up with crimped cs and Coll-All 3-D glue, and the extra butterfly is adhered just with Coll-All glue. The sentiment die cut was cut with a Spellbinders die, then, while still in the die, I sponged Dried Marigold and Peacock Feathers Distress Ink on it. The sentiment, from the Tulips for Friends stamp set, is stamped with Onyx Black Versafine ink, and the white doodles around it were made with the white paint marker. It is popped up with crimped cs, just slightly higher than the floral image. (I like using crimped cs for lifting layers because it is so easy to control exactly how high I want it to be.)
You may not have noticed the torn dp on the front of the card, as it's mostly covered up, but to coordinate with that, I tore some of the dp on the inside of the card, too. The butterfly, from the Old Tea Rose stamp set, was heat embossed in white, then I used a water brush to loosely paint it with Peacock Feathers Distress Ink. The doodles, again, were made with the paint marker. The floral image is another image from the Picking Wildflowers set, and I stamped the birthday sentiment, from the Inside & Out Happy set, onto a Spellbinders die cut, that was sponged with Dried Marigold Distress Ink.

Ready to play along? Grab those scissors, or your Silhouette, and get fussy! And, remember, you don't have to use Flourishes stamps, but if you do, you get two ballots toward the weekly prize! You can find all the details for the challenge here.

Be sure to check out the rest of our AMAZING team for inspiration, too! 
Thanks for stopping by, and get "fussy" this week!

~Hugs,
 
Supplies: 


Thanks for visiting my blog!
To have Ink Up delivered to your inbox,
subscribe in the box at the top right of the page.

A Simple Thanks

Monday, October 21, 2013


Just a quick little card to share with you tonight.
This is a small 3"x4.5" thank you card. It was so quick and easy to make--a couple of die cuts, some embossing with a scoreboard, a sentiment with some faint flower stamps as a bg, and a string bow. The glossy dots were made with a Glass Effect Gel Pearl Pen, but not directly on the card. Earlier, I made the "pearls" on my craft mat, then after they dried, I just glued them to the card. I wasn't sure I would like the extra step, but they formed perfect circles on the craft mat, and when I use my Pearl Pen right on the card, I almost always have some wonky looking pearls.

Thanks for stopping by!

I'm entering this card in the following challenge:
Viva la Verve October 2013 Week 4 Sketch Challenge: VLVOct2013

~Hugs,

Supplies: 


Thanks for visiting my blog!
To have Ink Up delivered to your inbox,
subscribe in the box at the top right of the page.

Psalm 84:11

Thursday, October 17, 2013


Hope you're having a great day! We've had rain here all day, but since I've been in my craft room most of the time, it hasn't bothered me one bit! For my card today, I used another Psalm stamp from Verve. This stamp is one that has been at Verve for several years, but I just recently saw it here and loved it! Stunning, isn't it? While my card isn't nearly as luscious as Tosh's card, I was pleased with how it turned out.
The supplies I used are at the bottom of the post, and it's pretty easy to see what I did, so I won't go into too much detail. On the b&w dp, I used Copic markers and added small gold and teal accents. The Award Banner die cut was made with white textured cs. I colored it with Peacock Feathers and Scattered Straw Distress Inks (the green is where the two colors mixed). For just a little more texture, I stamped a newsprint stamp on the banner with Black Soot Distress Ink. The sentiment panel is framed by two stacked corrugated frames. The bottom layer was painted with black acrylic, and the next layer was painted with metallic gold, black and teal paint. The word, "Sun," in the sentiment was colored with Copics, then I gave it sparkle with Diamond Stickles.
The two strips of b&w cs on the inside were from the negative die cut left over from cutting the Labels 7 panel for the front.

Thanks for stopping by today!

I'm entering this card in the following challenges:
Mojo Monday 315
Curtain Call Inspiration Challenge: Gorgeous Gourds

~Hugs,
 
Supplies:


Thanks for visiting my blog!
To have Ink Up delivered to your inbox,
subscribe in the box at the top right of the page.

Psalm 23:6

Wednesday, October 16, 2013


Happy Hump Day! ;~) (...aaaannnd, cue the camel--I love that commercial!) ;)

For this card, I used this sketch from the Viva la Verve October 2013 Week 3 Challenge, turning it sideways.

Rather than having 3 separately cut images, I created a strip with 3 flowers and a sentiment stamped on it. The images are all from the Surely Goodness stamp set. I did a little masking over the sentiment before stamping the flowers, and I masked the leaves on the center flower before stamping the pink flower. The flowers are colored with Copics, and the white accents are made with my new acrylic paint marker. The center of the flowers, as well and the centers of all the tiny flowers on the dp got a little sparkle with Stickles. I stamped the sentiment twice, first in Peanut Brittle, then in Rich Cocoa, for a shadow effect. The tiny bit of leaves showing behind the yellow button are from the Sunny Days stamp set.

When I distress a card, I try to make it look as if it really is old and worn. I hot glued the yellow and orange buttons on, but I actually sewed the pink one to the torn piece of cardstock so it would look like it was there when the cs was torn.

On the inside, I die cut a sentiment panel then sponged Picked Raspberry Distress Ink on the interior of the die cut, and sponged Tea Dye and Walnut Stain Distress Inks along the outer edge. I used a brown Sharpie marker to draw the line around the pink center. The dp was cut with a Spellbinders A2 Bracket Borders One die, and distressed with ink.

Thanks for stopping by today! Enjoy the rest of your week!

I'm entering this in the following challenge:
Viva la Verve October 2013 Week 3 Sketch Challenge


~Hugs,
 
Supplies:


Thanks for visiting my blog!
To have Ink Up delivered to your inbox,
subscribe in the box at the top right of the page.

Timeless Tuesday #242: Burlap or Canvas

Tuesday, October 15, 2013


I just can't get over how quickly this month is passing by! Halloween is almost here, last week my mother and I were discussing Thanksgiving arrangements for this year, and...well, I'll just throw this out there, too--71 days left until Christmas! :-@ But, that does mean 10 more Timeless Tuesday Challenges. Ah, that silver lining. ;-)


For the Timeless Tuesday Challenge this week, the super talented 
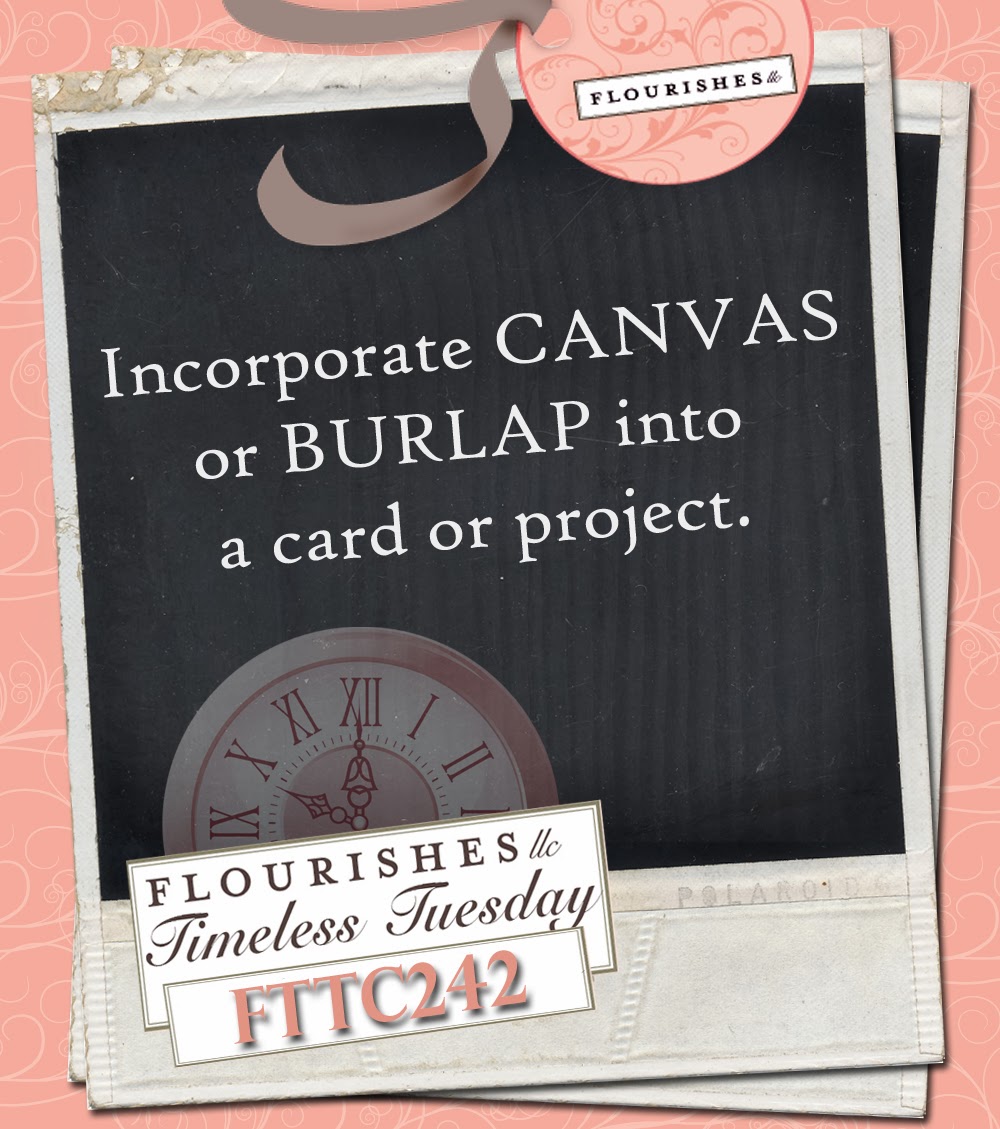
Deborah is challenging us to...


Rather than make a card this week, I decided to make a vintage wall hanging for the upcoming holiday season. I'm a huge fan of distressing, vintage, shabby, grunge--you name it. If I can age something (besides me, of course!), I love it! So the new, fabulous, Winter Berries stamp set, which reminds me of a vintage botanical print, was perfect for my project.

My project is built onto an 8" x 8" base of corrugated cardboard that I painted with green, dark brown, and metallic gold acrylic paint. The next layer is a square of kraft cs that I spritzed with Dylusions Ink Spray in Dirty Martini and White Linen and punched with a Martha Stewart Around the Page Punch Set. Over that, I layered red cs and dry embossed dark brown cs and zigzagged around the edges. Then, the fun part started.

The red square is a die cut stamped with a crackle bg stamp, edged with a gold Krylon marker, and backed with a piece of polka dot dp and a scalloped layer of kraft cs, edged with gold acrylic paint. The striped rectangle is a piece of scrap dp that I edged with Forest Moss Distress Ink and "stained" with Tea Dye Distress Ink using a little bottle as my stamp. Just for fun, I used mini staples to attach it to a mat of Capers cs, from Flourishes Color Made Easy Evergreen Paper Collection. The big sparkly flourish in the upper right corner is a chipboard die cut. The horizontal strip is another piece of corrugated cardboard, painted and wrapped with a piece of red burlap. The dark, sparkly holly die cut along the lower edge of that strip is a holly die cut, out of the Capers cs and painted with Sparkle Mod Podge.

The little frame came from the bargain bin at Michaels. I couldn't believe how perfect it was for the Season's Greetings sentiment! I used the little individual berries and leaf stamps from the Winter Berries set, along with some masking, to create the image under the sentiment. It is colored with Copics, and after die cutting the sentiment, I kept it in the die and sponged Tea Dye Distress Ink as a background color.

I had so much fun with the winter berry branch image. The stamp only has berries near the base of the branch, and not so many leaves, but since there is an individual leaf, as well as a tiny bunch of berries included in the set, I was able to fill out the branch quite a bit more. To add the extra elements to the image, I cut masks for all the leaves on the branch, several for the individual leaf stamp, and also several for the individual berry bunch stamp. Since I wanted some of my extra berries to be in front of the branch and some to be behind the branch, I needed to stamp a few berries first, before stamping the main branch. To make sure I had everything lined up, I first stamped the branch in Memento Angel Pink ink. Then, I was able to stamp the berries and leaves that I wanted in front of the branch directly on top of the light colored image. After masking those berries, I then stamped the entire branch in Memento Tuxedo Black ink, making sure to line the stamp up as close as possible with the pink lines. (I used a black Micron pen to add in any lines that didn't quite meet up). Finally, I masked off the branch and leaves and stamped more berries and leaves that I wanted to appear behind the branch. Then, I colored the entire image with Copics and added white highlights to the berries with Copic Opaque White Pigment. I had a beautiful photo of a winter berry branch that was covered in frost, and I wanted to try to recreate that here, so I added Distress Dry Glitter in Clear Rock Candy to the image, concentrating mostly on the edges of the leaves, then I airbrushed the bg with a Copic marker. (Note to self: next time add the glitter last so the airbrushing doesn't discolor it.) To add to the vintage look, I tore the edges of the cs close to the image, crumpled it up a little bit, and sponged the edges with Walnut Stain Distress Ink. After gluing everything to the base, I strung 3 little jingle bells onto a piece of bakers twine and hung it from the bottom of the image.


The hanger is a length of red and white striped ribbon that I distressed with Dylusions Ink Spray and Distress Ink. I put a couple of large eyelets in a square of strudy chipboard, threaded the ribbon through them, then attached the chipboard to the back of my project. Something I didn't count on was the weight of the frame. Because it is not centered on the project, it caused it to hang crooked. To counter balance it, I had to find something flat, but heavy enough to tape to the back of the chipboard. I ended up using several magnetic strips, a few metal washers, and even a broken money clip. After taping them to the side opposite the frame, I added a square of very lightweight cardboard to the other side, just to match the depth of the weighted side so that when it is against a wall, it will hang right. Not pretty, but it works! ;)

So, now it's your turn! I hope you'll play along! I can't wait to see how everyone takes on this challenge!

You don't have to use Flourishes stamps, but if you do, you get two ballots toward the weekly prize! You can find all the details for the challenge here.

Also, take a moment to be inspired by all our designers' blogs, and be sure to leave some love for them, too! :)
Thanks for stopping by, and have a wonderful week!

I'm entering this project in the following challenges:
Simon Says Wednesday Challenge: Use a Rubber or a Clear Stamp

~Hugs,
 
Supplies:


Thanks for visiting my blog!
To have Ink Up delivered to your inbox,
subscribe in the box at the top right of the page.

Christmas Peace: More Lace & Pearls

Thursday, October 10, 2013


Have you had a chance to play along with us in the Lace & Pearls Timeless Tuesday Challenge this week? If not, there's still time! :) And, be sure to cast your vote for Flourishes' People's Choice Guest Designer, too!

I posted this card on Tuesday, but I've got a second lace and pearl card to share with you now, using the new Handmade Snowflakes set that Flourishes revealed today. Snowflakes already have a lacy look to them, so they seemed the perfect stamp to use for this week's Timeless Tuesday Challenge.
This Christmas card was really simply to make. First, using Flourishes Perfectly Pierced Classic Window die, I cut two die cuts from Classic White Cardstock. With one of them still in the die, I stamped several of the snowflakes, from Flourishes new Handmade Snowflakes stamp set, with Versamark ink, then heat embossed with white ep. I sponged Festive Berry Distress Ink over the embossing. The next layer is another Classic Window die cut, sponged with Gathered Twigs Distress Ink. The final layer, is an Exquisite Circle Spellbinders die cut out of French Silk cardstock, from the Rich Browns Color Made Easy Paper Collection. I adhered pearls and Diamond Stickles to parts of the snowflakes. The Stickles absorbed some of the red ink and ended up turning pink. I don't like how it looks in the photo, but in real life, it's pretty.

For the sentiment, I cut the smaller die in the Classic Window die set, then heat embossed the "Peace" sentiment in white. I put it back in the die and sponged Gathered Twigs Distress Ink over it, then adhered red rhinestones to the ends of the die cut. For the lace portion of the challenge, I took a length of 2" wide lace, fan folded it, then tied red and white twine around the center, letting the ends of the lace fan out. I hot glued the lace to the back of the sentiment die cut, then tied the ends of the twine into a little bow and added a dot of Stickles to the center of it.
For the inside, I sponged Festive Berry Distress Ink inside a circle of classic white cs, then stamped a couple of the snowflakes with Memento Desert Sand Ink, stamping off once first, to get a very light image. The Love & Joy sentiment is from the Holiday Topiaries stamp set, and the Merry Christmas sentiment is from a retired Flourishes set called Holiday Greetings. For the base, I cut a slightly larger circle from the French Silk cs, and attached it to the back side of the front of the card.

You can find all the details for the Lace & Pearl challenge here.

Thanks for stopping by, and have a wonderful week!

I'm entering this card in the following challenge:

~Hugs,

Supplies Used:

Thanks for visiting my blog!
To have Ink Up delivered to your inbox,
subscribe in the box at the top right of the page.

Groovy


The Mojo Monday sketch this week was just right for one of the new Verve stamp sets I got with my Viva la Verve winnings recently. The "groovy" sentiment in the Surely Goodness set makes me a little nostalgic for the 60's. :)
The seam binding was dyed with Distress Reinkers, and the white faux stitches were made with a new pen I picked up yesterday--a Montana Acrylic Paint Marker. I think I've finally got a white opaque marker that will actually work! Yay!

I did some masking and stamped a few of the flowers from the Surely Goodness stamp set, then colored them with Copics. The inside sentiment is from a Hero Arts set.

I'll be back later today with another Flourishes card using the brand new Handmade Snowflakes set.

I'm entering this card in the following challenges:
Mojo Monday #314
Simon Says Wednesday Challenge: Use a Rubber or a Clear Stamp

~Hugs,
 
Supplies:


Thanks for visiting my blog!
To have Ink Up delivered to your inbox,
subscribe in the box at the top right of the page.