Timeless Tuesday #226: Make a Splash!

Tuesday, June 25, 2013

It's Tuesday! Time for another Timeless Tuesday Challenge at Flourishes! This week Broni is our hostess and her challenge for us is Make a Splash! All you have to do is create a card or project using watercolor, water scenes, colors of water, etc.

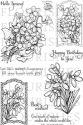
As soon as I saw Broni's challenge, I knew exactly which stamp set I wanted to use. Flourishes' Sweet Days of Summer stamp set has three adorable summertime silhouette images of children that have always reminded me of my DD, but the sprinkler image really makes me smile because my DD used to love running through her sprinkler on hot days. This was taken right around her third birthday:

Her Elmo sprinkler would spin in circles with water spraying in all directions, and my DD squealed and giggled and ran back and forth through the water until I had to practically drag her back into the house, shriveled up like a little raisin! She doesn't remember that day, but for me, it is one of those memories that I know I will enjoy forever. :)


Isn't this image sweet! Even in silhouette, it captures the joy of the moment. :) 

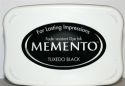
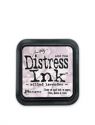
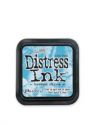
For my card, I die cut a circle from Flourishes Classic White Cardstock, then heat embossed the image in white. With the circle back in the die, I sponged Distress Inks in the summer colors of Mowed Lawn (for grass), Scattered Straw (for the hot sunshine), and Broken China (for a summer sky) over the entire piece. Then, following the Viva la Verve June 2013 Week 3 sketch, I cut three different dp's in my summer colors, did a little machine stitching, and layered them onto a blue background. I couldn't resist using the cloud dp--it was perfect. ;) Finally, I stamped the "Make a Splash" sentiment in Memento Danube Blue ink and added two strips of Washi tape. The sprinkler image is lifted with layers of crimped cs. To accent Broni's water theme, I put dots of Diamond Stickles on the water spray in the image. Also, down in the lower right corner of the card, I glued 3 "water droplet" scraps from a Rain Drop border punch, and gave them a good coating of Stickles, too.

On the inside, on the bottom of a layer of white cs, I glued part of the negative from the yellow die cut, punched a green zigzag, and added a strip of Washi tape, then sponged Scattered Straw Distress Ink around the edges.

If it's as hot where you live as it is here in Georgia, you probably think of nice, cool water often, so why don't you carry it one step further and make a card or project for this challenge while it's on your mind? ;) You don't have to use Flourishes stamps, but if you do, you get two ballots toward the weekly prize! You can find all the details for the challenge here

Now, for some fabulous inspiration for the challenge, run get yourself a glass of your favorite cold beverage to enjoy while you take a peek at each of our designers' blogs, as well as this month's Guest Designer, Berni Cuttino, and be sure to leave them a little love while you are there, too! 
Thanks for stopping by, and have a wonderful week!

I'm entering this card in the following challenge:
Viva la Verve! Sketch Challenge--June 2013, Week 3 (VLVJun2013)

~Hugs,
 
Supplies:

Thanks for visiting my blog!
To have Ink Up delivered to your inbox,
subscribe in the box at the top right of the page.

Bloom & Grow: A Mixed Media Card

Saturday, June 22, 2013

Were you a fan of Mona Pendleton's CR84FN Color Challenge?  I was, and I've missed it. Well, if you haven't heard, it's back--sort of. ;) This time, Mona and Sue Lelli have teamed up for A Mixed Media Color Challenge! I've dabbled in mixed media a little bit, so I'm looking forward to playing along when I can, and getting inspiration from Mona, Sue, and everyone else who enters the challenge!

I used the Viva la Verve June 2013 Week 4 Sketch Challenge for my card since it has lots of open space to play with.

I dry embossed kraft cs, distressed it with acrylic paint and gesso, then stamped the pink flowers with acrylic paint. The sentiment panel was stamped with Memento inks (I was going for a shadow effect on the sentiment, but it didn't work like I expected), spritzed with Perfect Pearls Mist, edged with silver paint, and then again with Black Soot Distress Ink.

For the flower, I used sheet music dp and Verve's Floral Circles die for the flower pieces. Then, I curled them with a stylus, put them together with a brad, spritzed it with water and crumpled the layers up tightly. When it dried, I spritzed it again with Perfect Pearls Mist, and added acrylic paint to the edges.

After putting everything together, I was done, except for cleaning up the gigantic mess I made! :)

Thanks for stopping by, and enjoy the rest of your weekend!

I'm entering this card in the following challenges:
A Mixed Media Color Challenge #1
Viva la Verve June 2013 Week 4 Sketch Challenge
Verve Diva Dare June 2013: Puddles of Color
Simon Says Stamp & Show Challenge: Kraft

~Hugs,

 
Supplies:


Thanks for visiting my blog!
To have Ink Up delivered to your inbox,
subscribe in the box at the top right of the page.

Purple Violas

Friday, June 21, 2013

I really enjoy playing along in the Viva la Verve sketch challenge every month. The sketches are always amazing--sometimes easy, sometimes, well...a challenge. ;) This month, in Week 2, there was a very challenging sketch for me.

Try as I might, I had a dickens of a time trying to come up with something for those big ovals in the background. I had a die cut that I had already been working on, that I really wanted to use, but it just wasn't big enough.

It was a navy die cut that I embossed with a paisley embossing folder, then swiped with bright purple and copper-colored paint daubers. I love the end result. After cutting it in half lengthwise, I edged the pieces with my gold pen. It was so pretty, I just had to find a way to use it. :-)
To make this card, I edged the purple dp with a gold calligraphy pen, scored an interior border, then colored the score lines with gold, also. For the "ovals" I embossed a lavender die cut with polka dots, then swiped a white paint dauber across the dots and along the edges, finally cutting it in half lengthwise, and layered the navy painted die cut on top of it. I lined them up with the score line rather than the edge of the card. Those pretty flowers are violas from a Flourishes stamp set. They are colored with Copics and a Prismacolor pencil, and the centers are yellow Stickles. I was able to lift the violas with the help of a new glue I got a couple of weeks ago called CollAll 3D glue. Great stuff. You just want to try to keep it off your hands--it is super sticky. I had to use Goo Gone to get it off, and it wasn't easy! Finally, I added a sheer bow, buttons, some memory thread, and a few pearls. The little spot beside the violas was the perfect place for an itty bitty sentiment, so I stamped the cute "hello" stamp from Verve's Tag Time set. An olive green base was my final layer.

Here's a better pic of the violas. Can you see the light streaks of yellow coming from the center of the flowers? After coloring them, I used a few streaks from a yellow Prismacolor pencil to lighten up the navy centers. After fussy cutting the image, I "aged" the image by sponging Milled Lavender Distress Ink over the white edges.
I almost left the inside blank, but it felt a little naked, so I edged a rectangle of white with my gold calligraphy pen, stamped the sentiment in the corner, and added a pretty punched border at the top. Even with all that it looked a little blah until I put bright yellow Stickles on the border. Then, it was done! :)

Thanks so much for stopping by! I hope you have a wonderful weekend!

I'm entering this card in the following challenges:
Viva la Verve Sketch Challenge June 2013, Week 2
Verve Diva Dare June 2013: Puddles of Colour

~Hugs,

Supplies:
To have Ink Up delivered to your inbox,
subscribe in the box at the top right of the page.

Timeless Tuesday #225: Scallops--One More Card!

Tuesday, June 18, 2013

Hello again! I had to make just one more card for this week's Flourishes Timeless Tuesday Challenge. :)


Since I already posted one card today, I'll be brief. You can see my earlier Timeless Tuesday post here. And, you can find all the details for the challenge here.
For this card, I started with a paper napkin. After pulling all the layers apart, I glued the bird image to a piece of white cs with ModPodge, then after it dried, I coated the image with Sparkle ModPodge. Once that was dry, I treated it just like I would any designer paper. The sentiment I used is from the Life Lines stamp set, and is one of my favorites. The font is beautiful, and the sentiment is appropriate for just about any occasion. I sponged Distress Inks (Peeled Paint, Shabby Shutters, and Broken China) on a banner die cut, then heat embossed the sentiment, and added 2 Swarovski  crystals as an accent. After framing the napkin image with a square die cut, I layered it with the scallop die cuts, added more crystals, and walked away! If you've been around my blog very long, you probably noticed that I love distressed cards, so leaving this one so pure, was a little bit difficult, but I'm glad I did. ;)
In this angled photo, you can see that I curved the banner slightly. There is a foam dot behind the curve to keep it from getting squished.

And, I just had to show you all the sparkle. The napkin area is covered with glitter, and look at those Swarovski crystals shine!

Okay, I'm done for today. If you haven't already checked out this week's Flourishes Timeless Tuesday Challenge, you should. It's fun, and who knows, you could win a prize!
Thanks for stopping by...again, and enjoy the week!

~Hugs,

Supplies Used:


Thanks for visiting my blog!
To have Ink Up delivered to your inbox,
subscribe in the box at the top right of the page.